Hey there! It’s Brittni from Paper & Stitch! I’m excited to share another summer tutorial with CreativeLive readers. You may remember my last set of summer DIYs: DIY fruit kabob place cards and DIY watercolor napkins. And today I’m sharing how to makeover an old serving tray in a colorful, affordable way without having to use any paint. Also be sure and check out the complete collection of upcycling classes on CreativeLive – including how to make your own paper!
Bonus! Once you’ve mastered this DIY tray makeover, be sure to check out the last summer tutorial in this series on my blog, for DIY clay drink stirrers.
I love giving old pieces new life (or clearance items that are too inexpensive to pass up) and that’s exactly what I did with this beat up serving tray. There were plenty of nicks and scratches on this tray before, but it was extremely affordable and a great shape, so I brought it home and started brainstorming. The deep color of the tray wasn’t very summery before, so I decided to add a bright patterned paper, in the same color family, to make it feel more summery and hide the flaws.
Want to make your own? Here’s how…
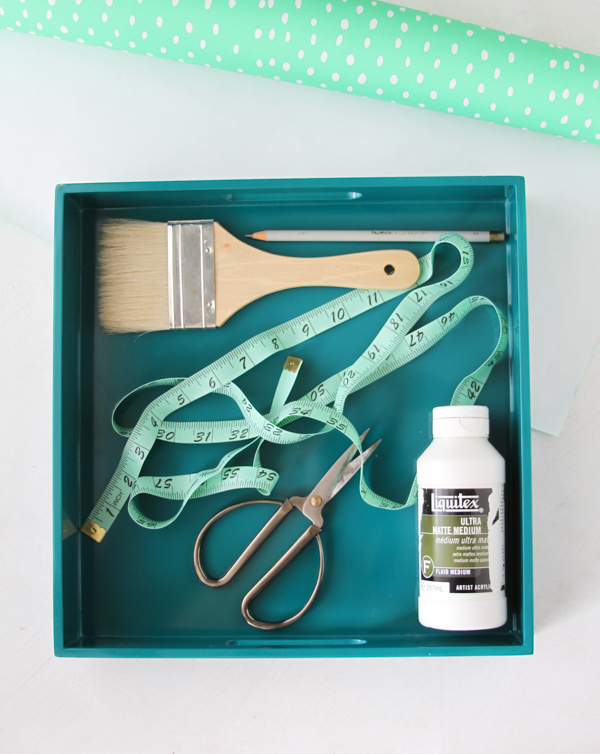
Supplies:
Serving Tray (I bought mine on sale at West Elm)
Matte or Gloss Medium (I used Liquitex brand, which is non-toxic)
Paint Brush
Decorative Paper (or make your own!)
Scissors
Measuring Tape and/or Ruler
Pencil
How-To:
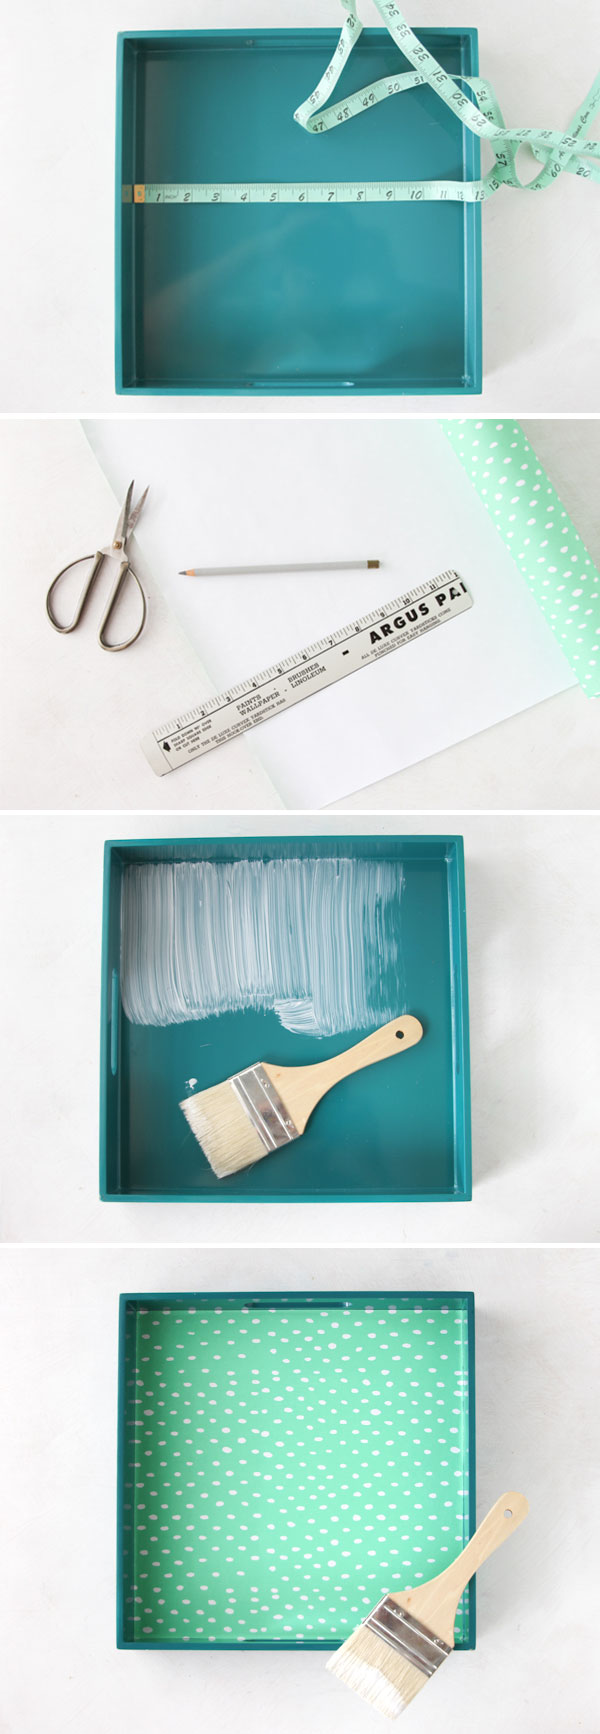
1. Start by measuring the inside of the serving tray all the way around. One side may be slightly smaller or larger than another, so it’s important to measure all sides.
2. Next, cut your decorative paper to those exact dimensions. Remember to measure twice and cut once. Set paper aside.
3. Then, apply an even coat of matte or gloss medium to the inside of the tray. I used a wide brush to help keep the coverage even.
4. Add your cut piece of decorative paper to the inside of the tray and run your hands over the the entire surface to get rid of bubbles and/or wrinkles. Once the medium underneath the paper has had time to dry (at least a couple of hours, if not longer), apply a thicker coat of matte or gloss medium over the paper that is now glued to the tray. This will serves as a sealant. Let dry overnight. Then, it’s ready to be used.
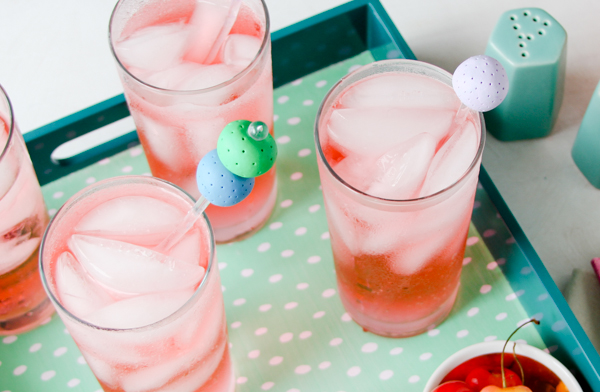
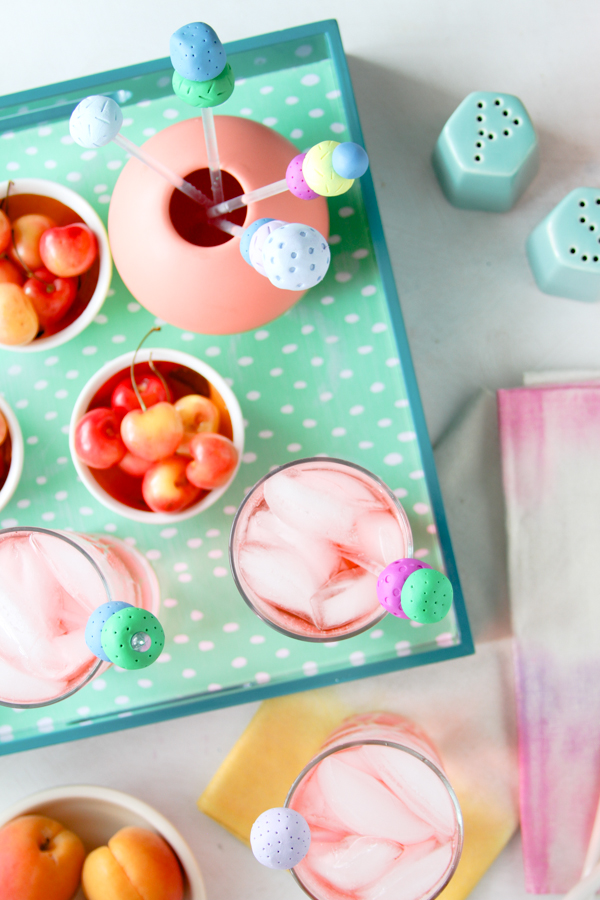
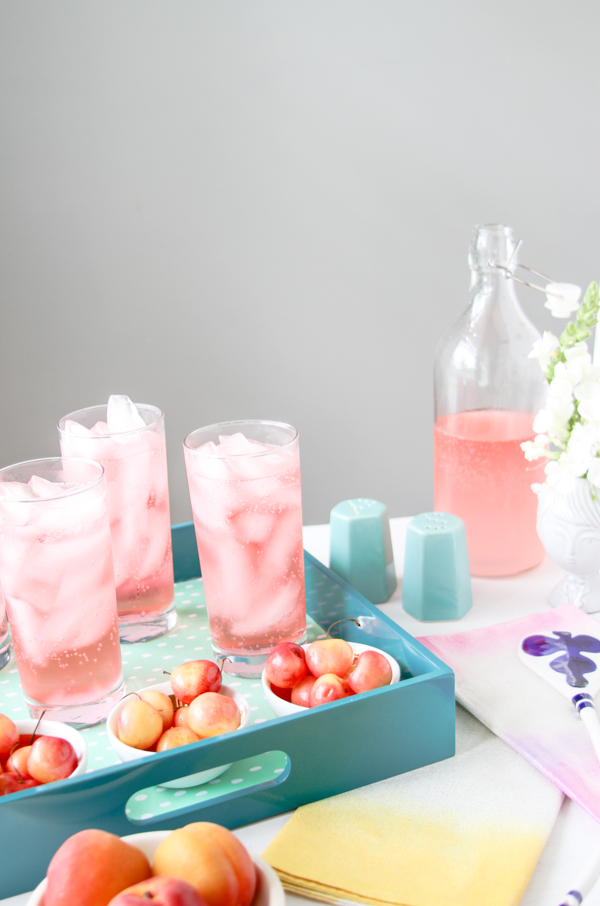
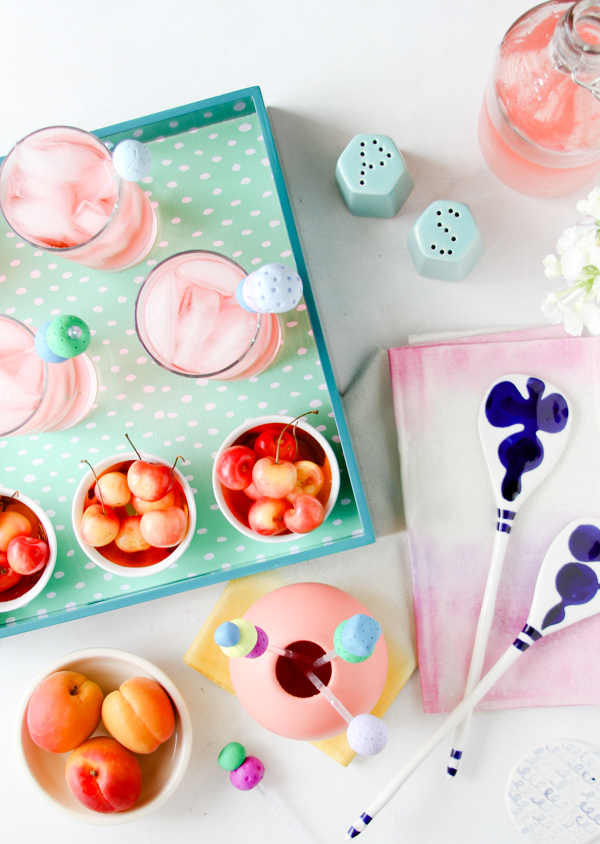
You can use this serving tray for drinks, snacks, and pretty much anything else you can think of. If you’re having a party, a tray like this would be perfect for entertaining – passing around drinks or appetizers, etc.

Concept, photography, and styling by Brittni Mehlhoff
Looking for even more DIYs to try? Get the tutorial for the colorful clay DIY drink stirrers pictured in these photos, right here.