One of my favorite Photoshop tools is not a plug-in: it’s my camera. When I have my camera in hand, I often use it as an extension to Photoshop, taking photos with the intention of working with them in Photoshop. As I set up my shots, from the camera settings to the framing, I’m thinking ahead to how I’ll use the images in Photoshop.
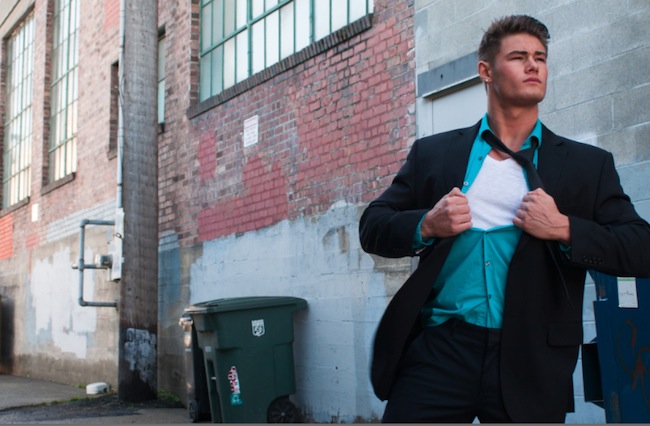
In this example, I wanted to create a superhero look, with the subject gradually becoming the superhero. After setting my camera up on a tripod, I explained the thought process to the model, walking him through the shots. Then I took these four photos:
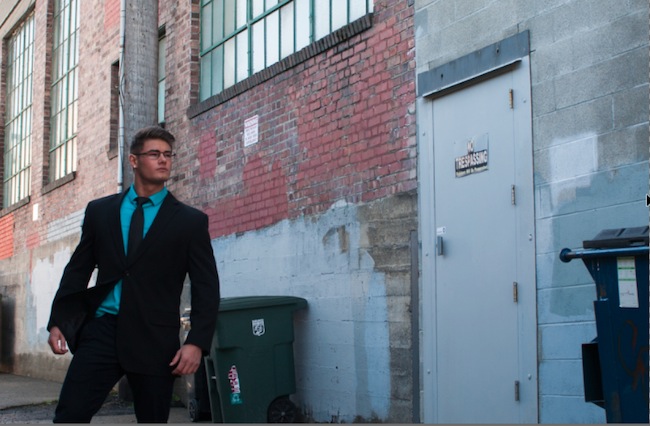

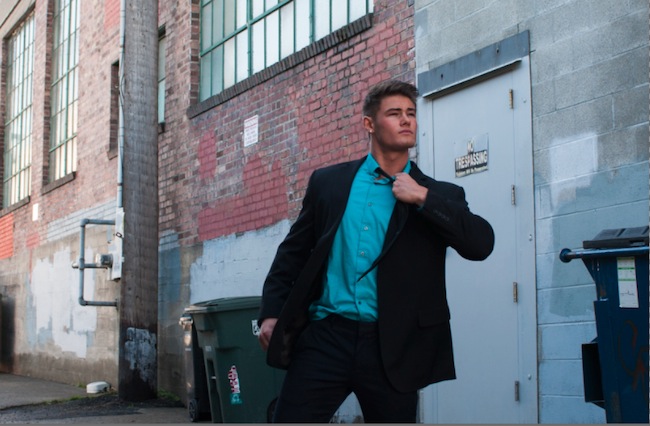
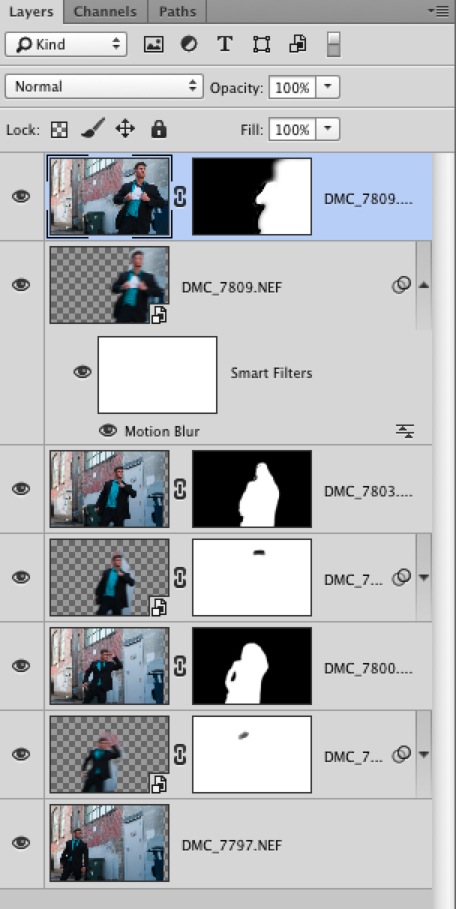
I opened all four files in Camera Raw, synchronized the files and made some adjustments. Rather than clicking Open, I clicked eDone.

Then I selected all the files in Bridge and used Tools>Photoshop>Load Files into Photoshop Layers. This created a new document with each of the files on separate layers. In this case I used a tripod – that’s highly recommended – but if you can’t you can select all the layers and use Edit>Auto Align Layers to make sure everything is perfectly lined up.
From there, it was a relatively simple task to add Layer Masks to each layer to combine them the way I wanted. I took it a step further and made copies of each layer that I blurred, using Smart Filters so I could edit and mask the filter.
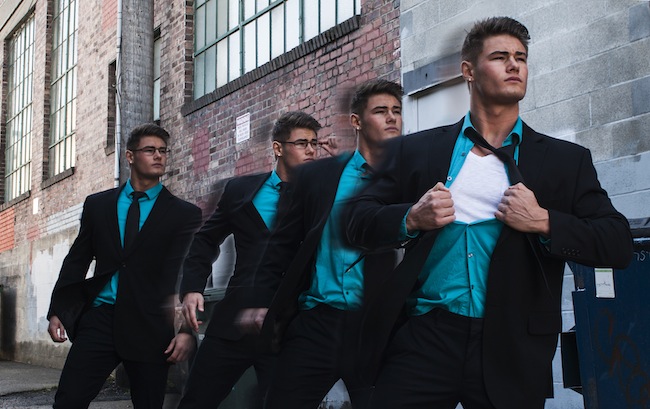
Needless to say, I’ve zipped through the steps very quickly, but the main point is that if you plan your shots with Photoshop in mind it’s much easier to work with them in Photoshop. As you look through the viewfinder, imagine you are creating Photoshop layers and a world of creative possibilities become available.
In my Photoshop Week class Photoshop Creativity Through Flexibility I’ll be covering some of my favorite ways to use flexible methods to experiment in Photoshop to work with my photos.