Despite the amazing dynamic range of today’s modern cameras, many more photographers have begun trying their hand at creating HDR (High Dynamic Range) images. These are made by taking photos of the exact same scene at varying exposures to compensate for high-contrast areas (blown highlights or deep shadows). For instance, a photo of a backlit subject can have a desirable exposure for both the subject and background using HDR. The photos are made of at least three separate exposures — for example: one stop underexposed, a correct exposure, and one stop overexposed. But after running the files through an automated merging program or action, the results often miss the mark and so the entire process has to be repeated all over again.
Not so with Adobe Camera Raw used as a smart filter.
As Julieanne Kost demonstrates on the Adobe Photoshop YouTube channel, the power of a Lightroom-Photoshop tandem enables the user to nondestructively edit multiple images that can not only be adjusted with more flexibility, but also as often as needed. Basically, this means you have the ability to make adjustments on the fly, which then translates into time saved throughout the entire editing process. Here’s how:
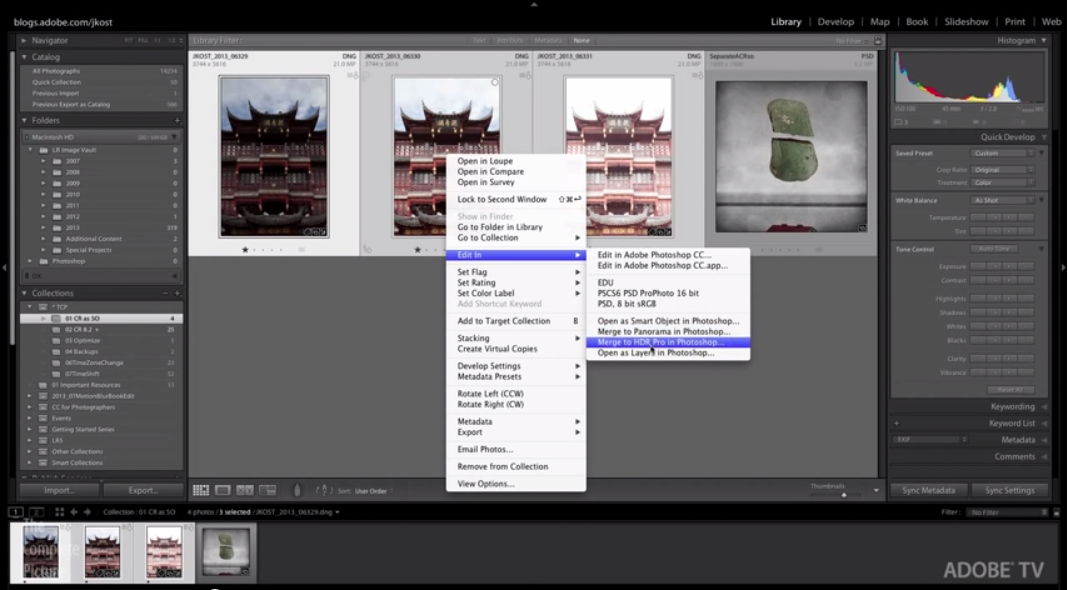
Once all the files have been imported into Lightroom, make the necessary adjustments and lens corrections to each image. Instead of exporting, in the Library module, right-click and select Edit In > Merge to HDR Pro in Photoshop.
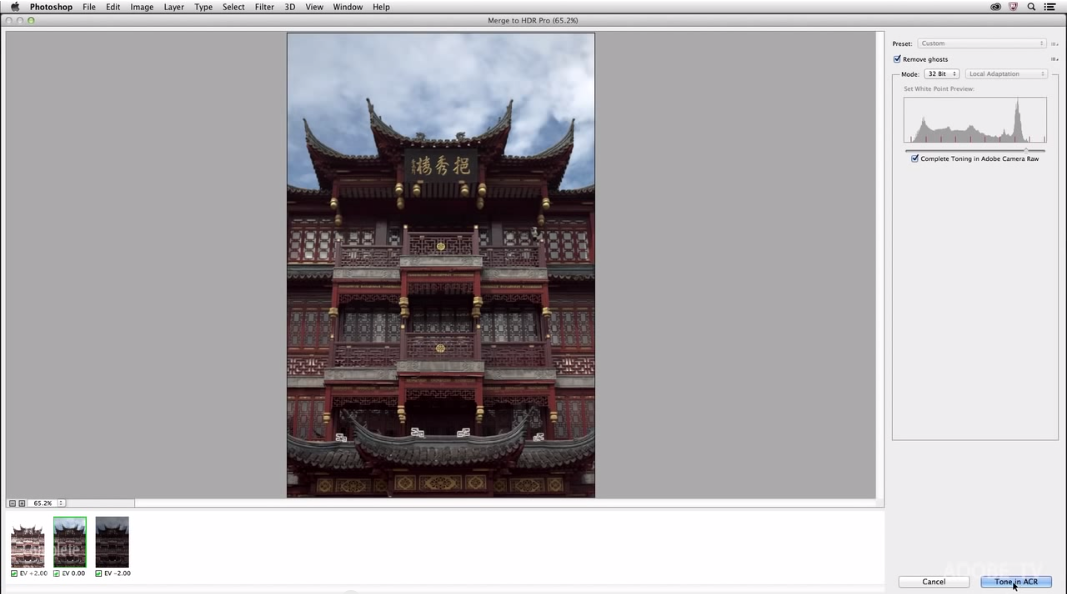
All images will then load directly into Photoshop using the best-exposed area of each file combined into a single image. In the preview window, select 32 Bit in the dropdown Mode menu instead the default 16 Bit. This allows for the new “Complete Toning in Adobe Camera Raw” option to be selected. Check the Remove ghosts box and click Tone in ACR to continue.
You will then be brought into the Camera Raw dialogue window where you can make the adjustments using the familiar sliders. Additionally, all the other adjustments, both selective and global, can be made via the other tabs such as Tone Curve, HSL/Grayscale, and so forth. You can toggle the Preview checkbox on and off to see the changes before applying them.

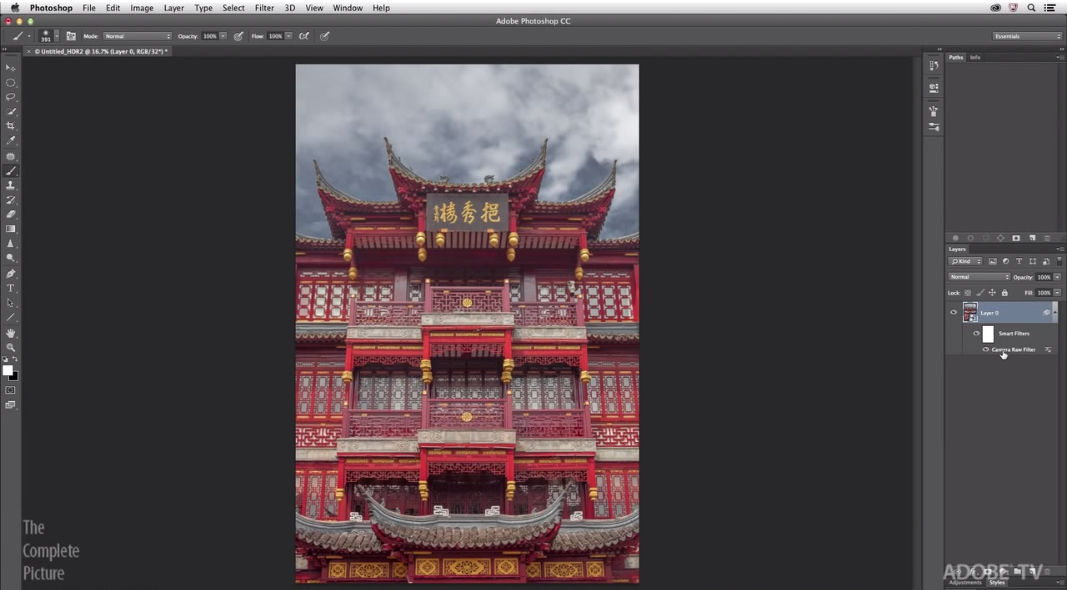
After hitting OK, Photoshop will then load the image with the Camera Raw adjustments as a smart filter which makes all the changes non-destructive to the original image. And that’s really the beauty of it. Now, if you need to go back and make additional changes later on, all you have to do is double-click the Camera Raw filter and take advantage of the bevy of tools available to you.
Furthermore, sometimes you reach a stage in your project where having to go back to one of the existing layers and make a change such as Clarity is no longer an option. Camera Raw as a smart filter gives you that ability without having to return to the original image to make those adjustments.
All you have to do is go into the Filter menu, and convert the layer (or layers) into a smart filter. Go back to the Filter menu, and select Camera Raw Filter and make the necessary changes. The smart filter also allows you to mask away the adjustments as well as change the blend mode.
So there you have it! The versatility of Adobe Camera Raw in Photoshop CC. For more Photoshop tips, don’t miss creativeLIVE Photoshop Week this February 24-28.
*Screenshots via www.youtube.com/Photoshop
Source: Adobe Photoshop on YouTube