

On a professional, commercial or editorial shoot, food stylists prepare food to make it look “real,” or better than real. This requires quite a few food photography tips and tricks. Stylists also help set the scene and tell a story, while the photographer and photo assistant handle the lighting, composition and framing. If you are photographing for a blog, magazine or cookbook, working with a great food stylist isn’t always possible, so here are some helpful food photography tips that will enhance your imagery.
Use real, natural food
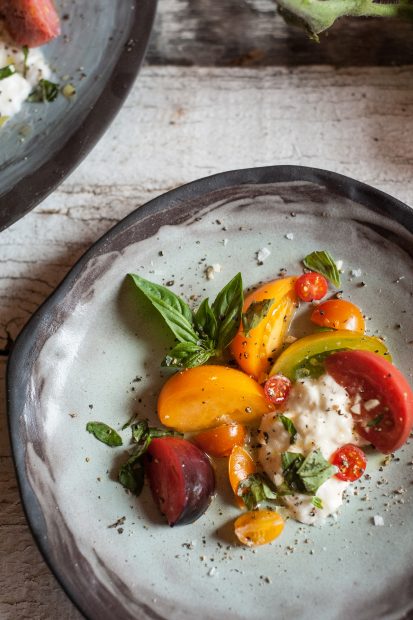
The colors and textures of a dish are the key details that make you want to take a bite. The best way to emulate those features is to use real food.
In order to maintain the best look for your food, components of a dish might need to be cooked separately in order to maximize the freshness of each ingredient. Food also needs to hold up for the duration of your shoot, so don’t overlook things like ice melting or foam going flat and plan to have backups on hand. Food photography takes time, and often you will need longer to get the composition, lighting and setting right than a piece of ice will stay frozen.
Appearance of ingredients in food photography is so much more important than what you use at home for meals. It’s critical to remember that the high megapixel count and the quality of lenses today show fine details in the scene. Every item must be photo-perfect. A pig in lipstick is still a pig no matter what you do, and a wilted head of lettuce will read sloppy and tired to the camera even more than to the eye.

Look for unblemished ingredients
Make sure they have good shape and nice coloration. Farmer’s markets and specialty groceries have a wider variety of shades and hues, and often unique or unusual items.
Innovate with spices
Sometimes it’s how you get there that counts. Process shots can be more valuable for explaining a recipe than a final put together shot. Spices, for example, will make more sense when you show individual ingredients measured out into bowls, rather than the final product.
Join Liza Gershan to learn how to take eye-catching food photos that will get you noticed on social media. Learn More.
Garnish the plate
Remember you are trying to create a mouth-watering food scene. Garnishes should be edible. If you wouldn’t put the garnish in your mouth, then it probably shouldn’t be used in the image decorating the plate.
Perhaps your dish is best with garnishes — like a martini with olives. Think about the dish and what additional ingredients or garnishes are typically presented with it. This will ensure the viewer easily understands what they are seeing. A martini without an olive just looks like a glass of gin (or worse–water). Context is important in telling your dish’s story.
Use natural light.
This one is simple, but I can not overstate it enough. Use natural light whenever possible! Natural light is the most beautiful light for photographing food.
Carry a ‘food stylist kit’ at all times
This should include:
- A sharp knife to make even, precise cuts
- Brushes to work with liquids and drops, dust surfaces or move powdery ingredients. You can purchase brushes from art stores and makeup suppliers
- Small scissors to trim edges, make stencils for decorative desserts, and cut parchment paper down to size
- Tweezers to place and arrange small objects
- Ruler to create equal visual spacing and measure distances between items
- Offset spatula to smooth out textures like condiments or frosting
Professional food stylists are the key to successful magazine and cookbook photography. They are just as important as the the actual photographer. Their jobs range from doing the actual cooking and plating of the food, to selecting cutlery and tablescaping. When you can practice these skills, you can truly enhance your food photography.
Practice in your own kitchen before any shoot. Try placing food in a variety of ways on a dish and photograph each one. The camera and the eye see very different things, but over time it will become intuitive to know what type of plating works best for the camera.
Are you ready for the biggest Photoshop event of the year? Join CreativeLive for Photoshop Week 2018 to learn how to produce professional quality photos and reach your full creative potential. RSVP Today.


