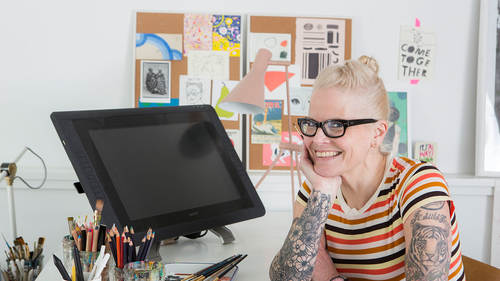
Jorge Paricio is an adjunct professor of Industrial Design at the Rhode Island School of Design (RISD), and author of Perspective Sketching, Freehand and Digital Drawing Techniques for Artists & Designers by Rockport Publishers. “Industrial design sketching is a crucial part of developing a concept and it usually starts with the creation of lots of thumbnail sketches that are later refined in successive stages into full renderings,” he says. “Our concepts have to tell a complex story, from how the product will be made to how it will operate.”
Below, Paricio walks us through five drawing exercises demonstrating the importance of perspective sketching. Whether you’re an industrial, interior, or graphic designer, getting a handle on drawing will help you grow as a communicator.
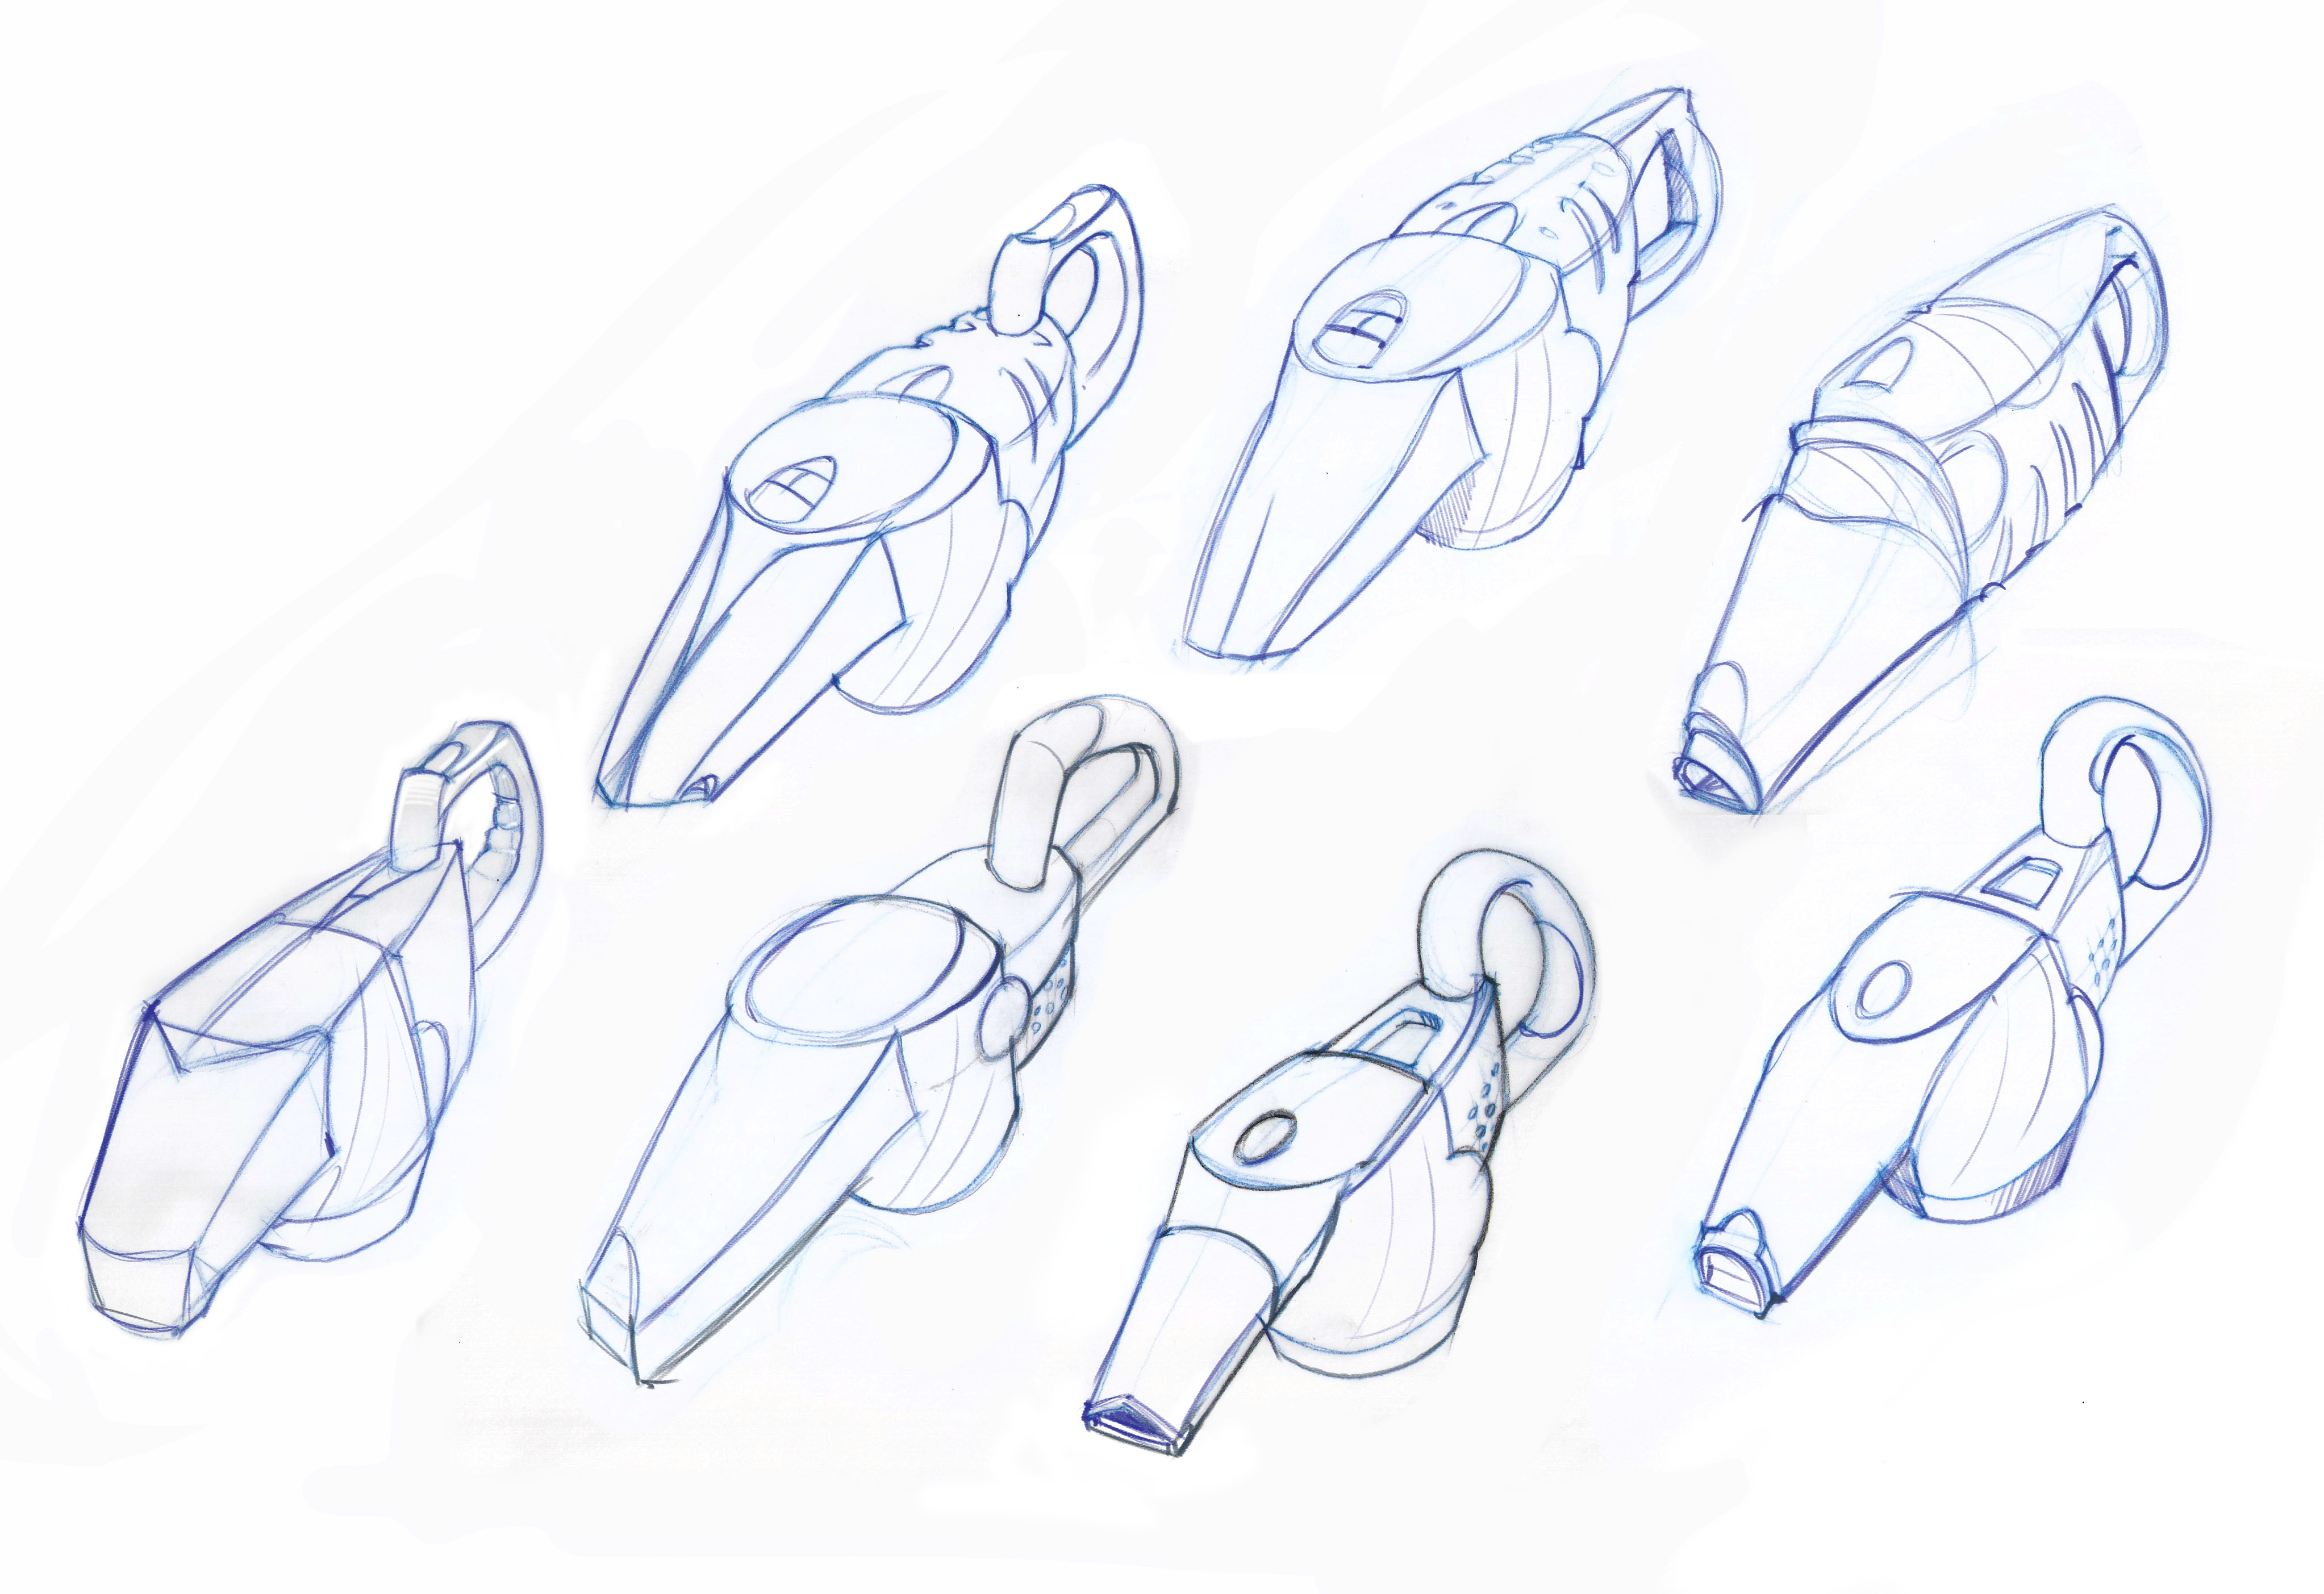
Thumbnail sketches
In the preliminary sketch stage, designers have to consider all variations of shapes. In this phase, we have to make sure that every distinguishable part has been explored formally (in this case we have the handle, the motor, the dust container, and the nozzle). During this phase, avoid using color, keeping the focus primarily on the form development. This process can take weeks or even months, depending on the complexity of the project. It usually involves drawing just with a black or light blue pencil on tracing paper.
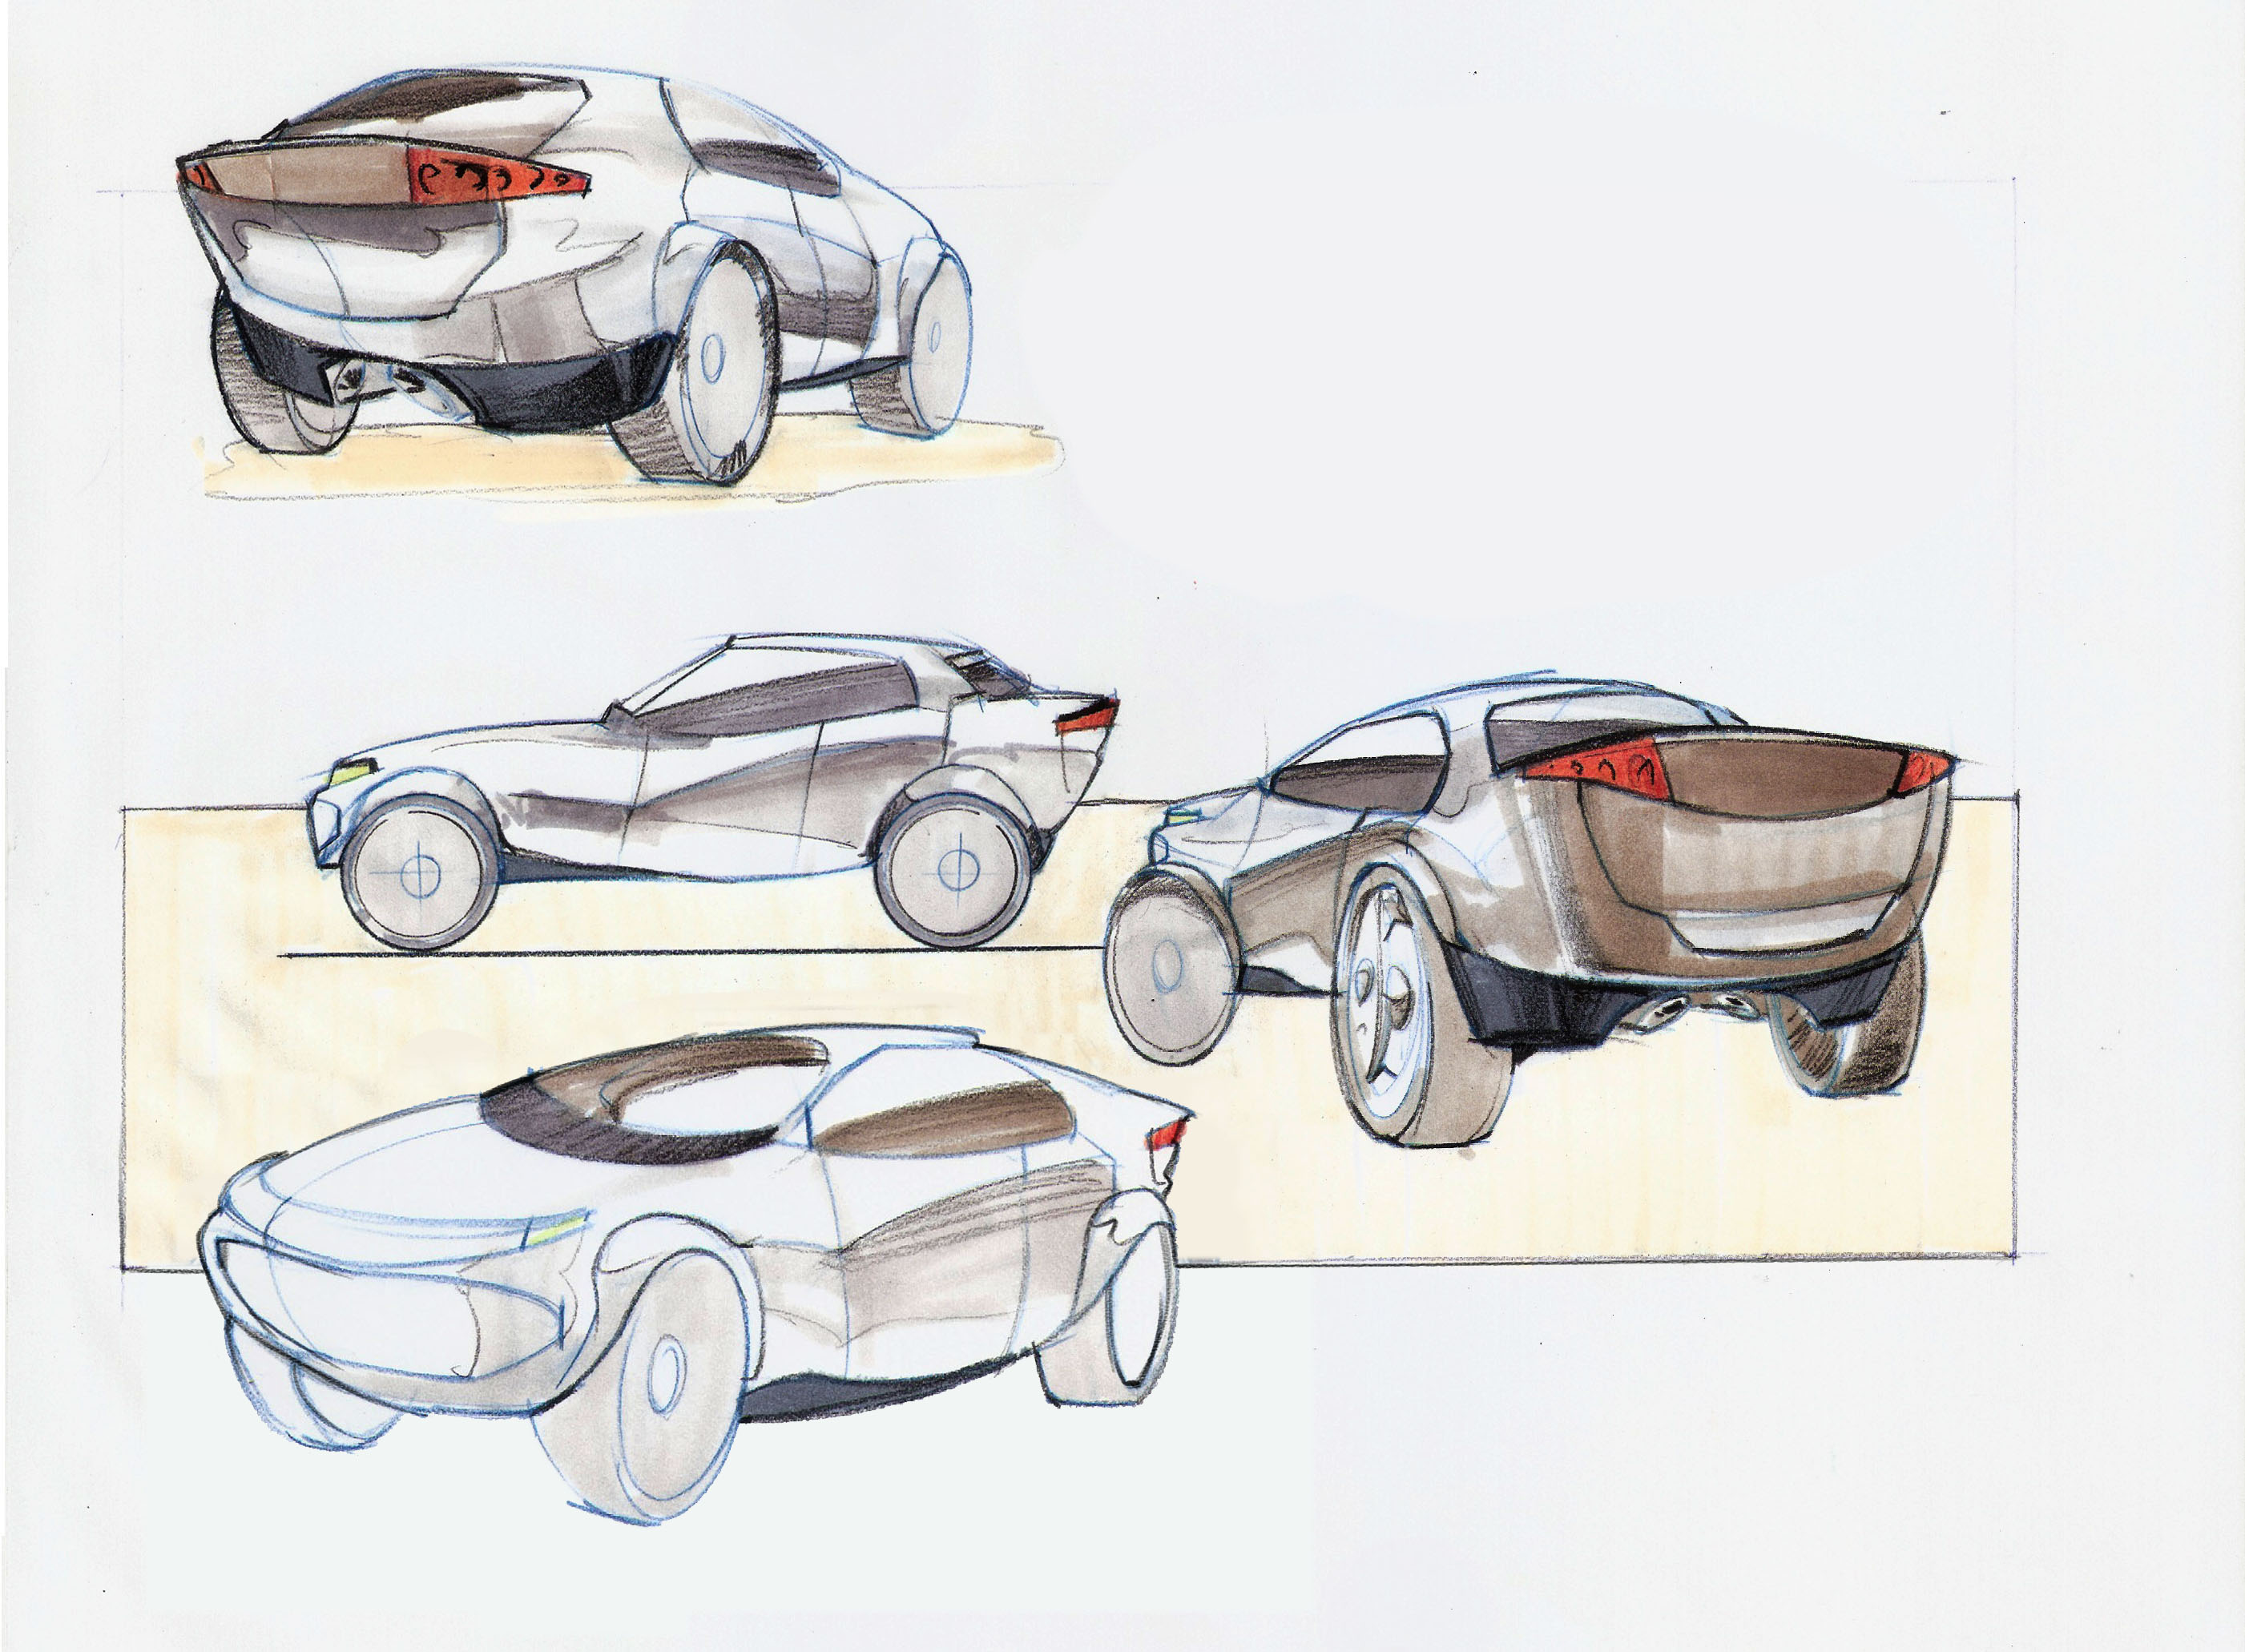
Creating different points of view
Once a preliminary idea is established, it needs to be shown from different viewpoints. Just the same way that a sculptor would review his art form from all angles, designers need to do the same thing, but making sure that the concept is cohesive. As a general rule, always keep in mind the type of customer that would be buying this product. In this example, there is a two-door compact car designed for young urban audience, and it’s important that the design speak that language.
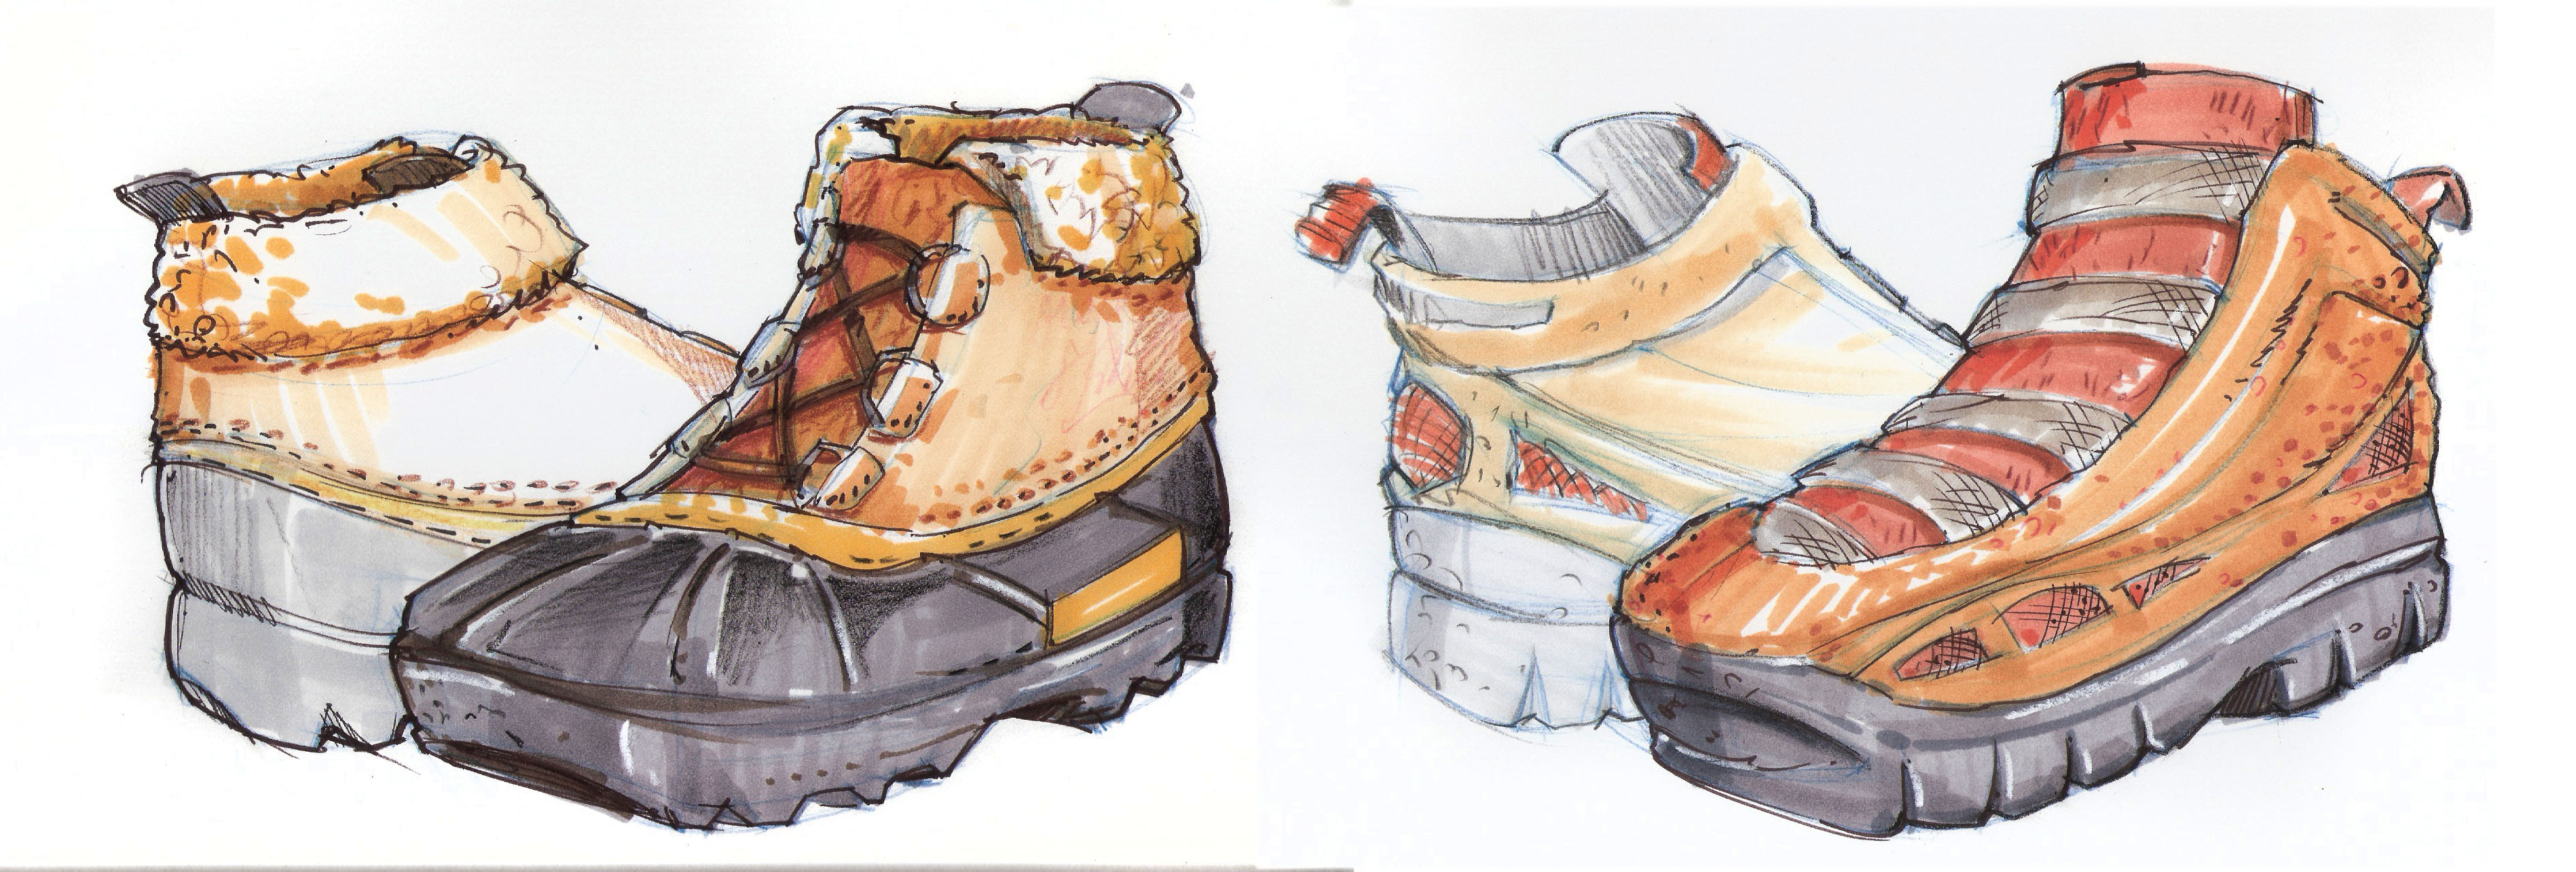
Refining an idea and showing different materials
When designing a product, always be ready to suggest a variety of materials during the ideation phase. The drawing on the left shows a waterproof sole and a low cuff. The installation material on the liner is also suggested with a different type of stroke using the markers. The boot on the right suggests a different type of insulation, and materials altogether. The straps on the instep suggest a flexible material that is woven. The dots on the side of the boot also shows a leather-like material, which contrasts with the dark rubber sole.
Adding backgrounds and technical views
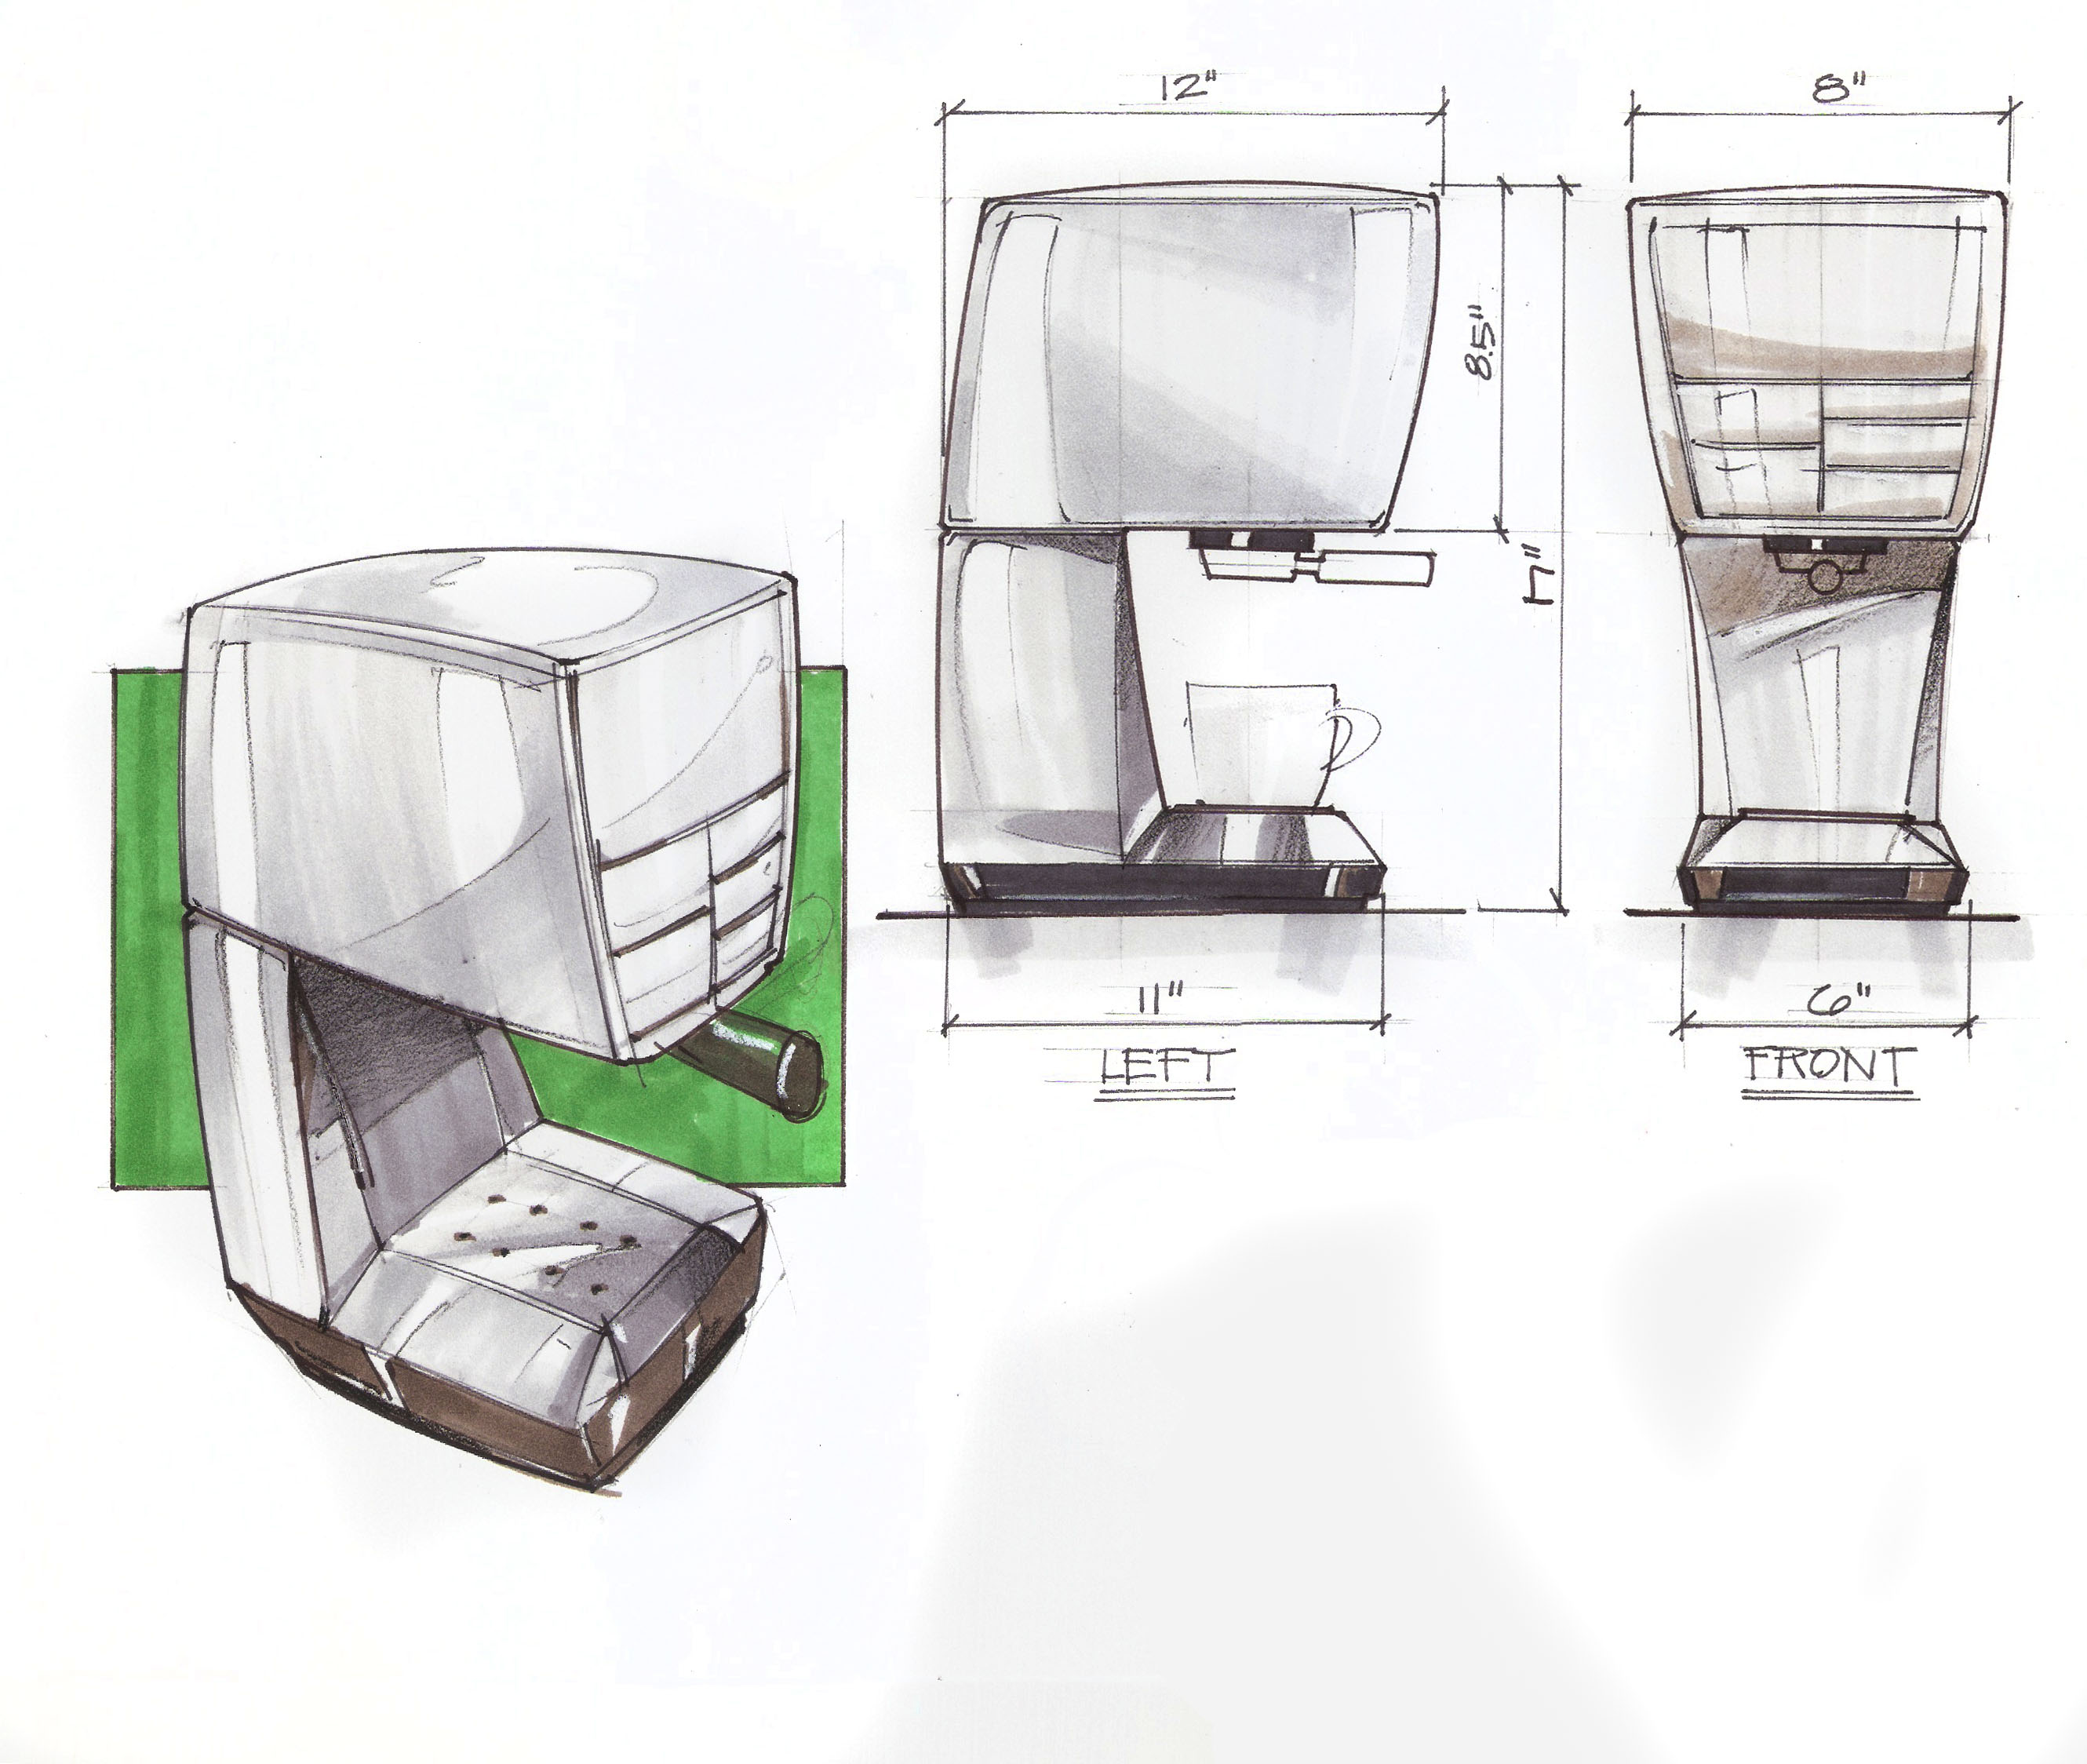
At this stage, it is advisable to include a perspective view, along with a front and side view (done without perspective) to show basic dimensions. In this example, we have a design that initially was thought to be done in polished stainless steel (later this design was modified so that the top would be presented in a chromed purple top). To make the board more interesting visually, a green background was added as an excuse to make the perspective be the focal point of the board, and to add more visual interest. A coffee cup allows viewers to get an idea of the size of the coffee maker.
Call outs, body parts, and backgrounds
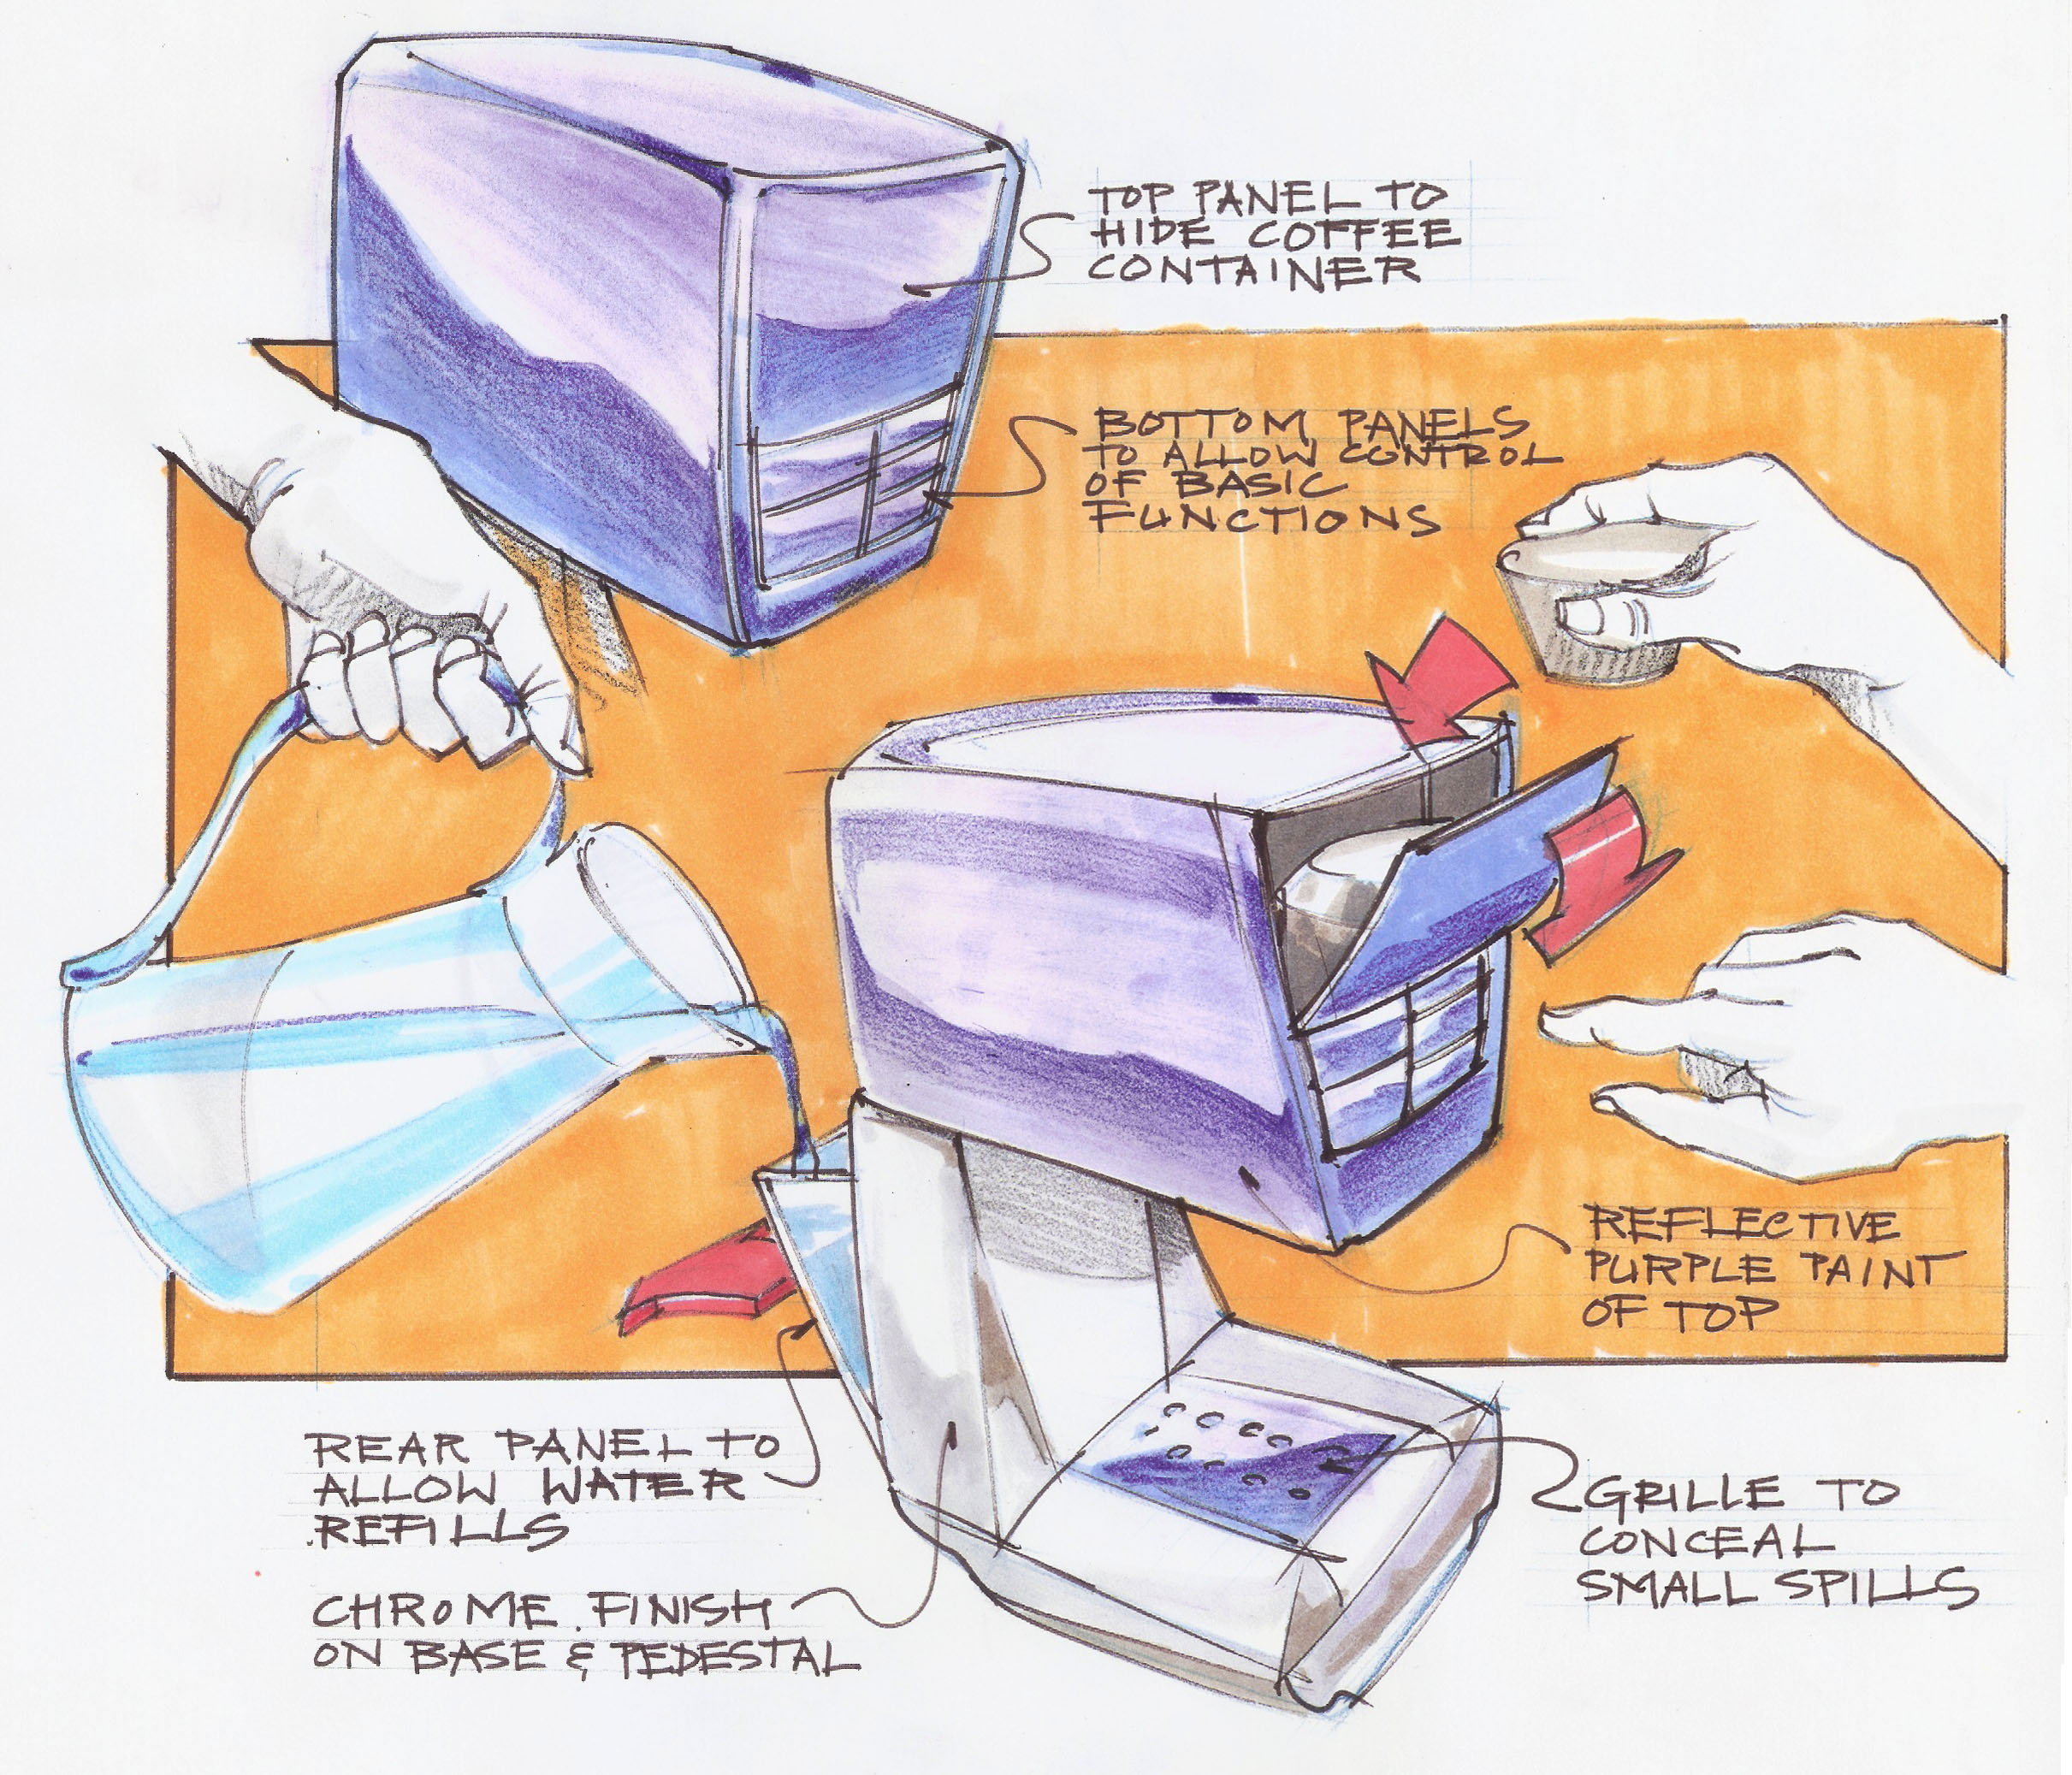
In this example we see a coffee maker concept in a complex composition that involves a full concept, a partially rendered part, text blocks (called callouts), arrows to indicate movement, body parts, and a background shape that unifies everything. In a concept page, such as this, it’s important to have a cohesive composition, so the page isn’t disorganized. Call outs explain the purpose of each compartment, while rendered hands demonstrate how to use the coffee maker.