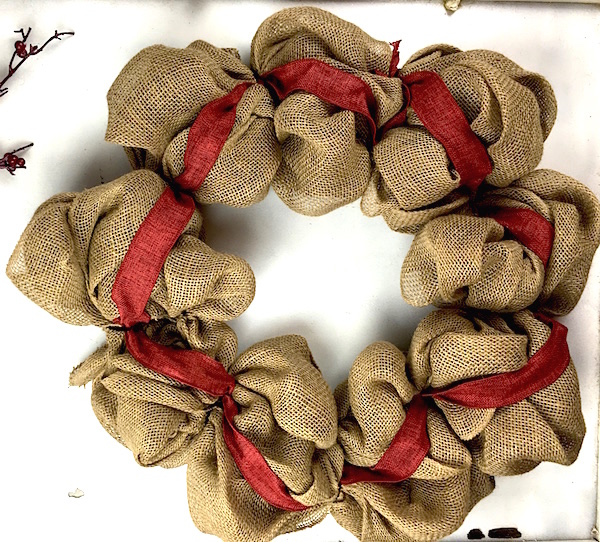
Winter and the holiday season are the perfect times to adorn your home with festive wreaths and decor. Burlap wreaths have a rustic appeal and they can be decorated with just plain burlap jute ribbon or you can deck them out with berries, ornaments and more. Use this post to learn how to make a burlap wreath that you can proudly show off!
They also make the perfect holiday gift!
While the finished burlap wreath looks technical it really is simple. Take a look at how we made this winter holiday burlap wreath and get precise instructions for how to make your own burlap wreath.
Materials you will need:
12” or 16” wire wreath form
10- 15 pipe cleaners in natural light brown or dark brown color
Decorative ribbon in your choice of color
2 – 6” or 12” wide rolls of burlap fabric (Use wider width for a fluffier wreath)
Holiday decorations (Poinsettia flowers, holiday ornaments, faux berries)
Scissors & wire cutters Glue gun and glue sticks

How to Make a Burlap Wreath – DIY Instructions:
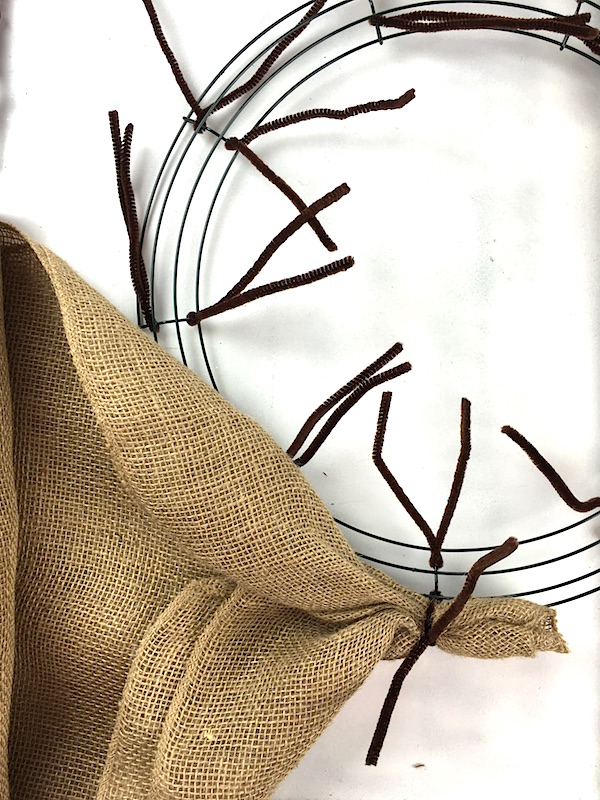
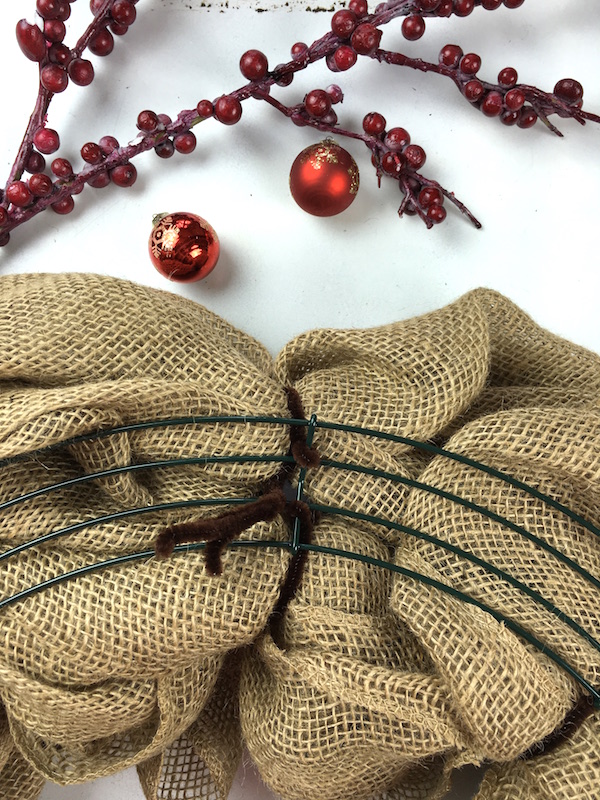
1. Take the wire wreath form and one pipe cleaner and loop the pipe cleaner through the wreath at each “separator” of the wreath. You will have one in the inner and one at the outside rings around the entire form.
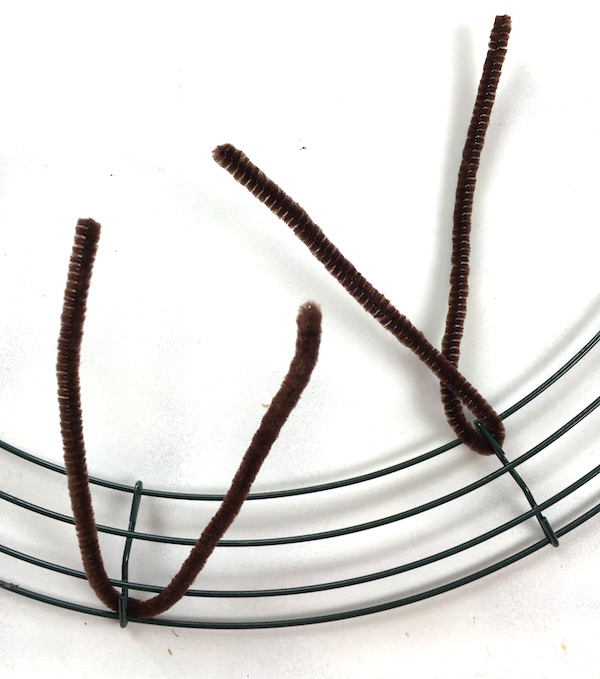
2. Continue to secure pipe cleaners around the entire wreath. These pipe cleaners will keep the burlap fabric and ribbon in place. (You can also buy a wreath form that already has wire attached but they’re more expensive).

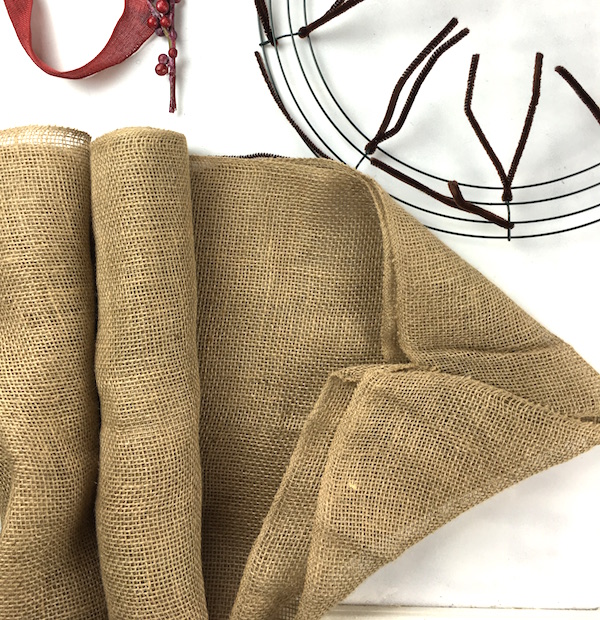
3. Once the pipe cleaners are secure it’s time to layout your rolls of burlap fabric. Unwrap the ends of both or just one roll of fabric if you want a tighter and smaller “bubble” fluff to your burlap wreath. I chose to use two rolls together.

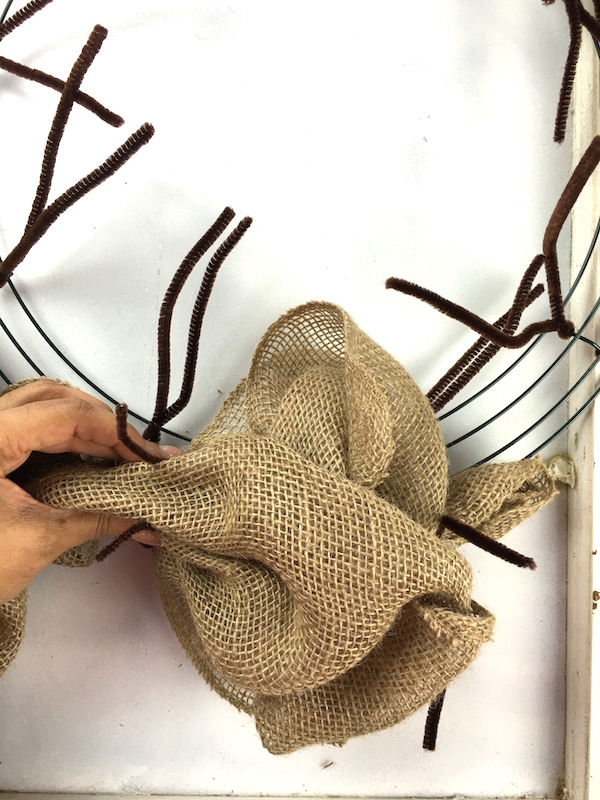
4. Fold the burlap fabric into a point so you can secure it to the first pipe cleaner on the wreath form. Bunch it up with your hands and choose an outside pipe cleaner to secure the fabric. You will then bunch up the fabric and secure again on the next outside pipe cleaner. Continue bunching and securing around the entire frame, ensuring to stay on the outside ring of the wreath form.
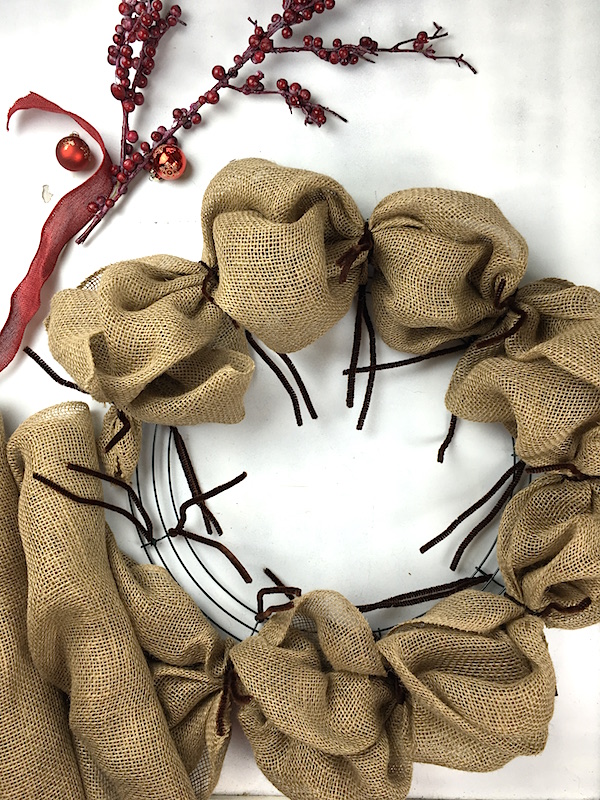
5. Once you have completed the outer ring of the wreath form you will use the same method of bunching the fabric but now with the inner ring of the wreath form. If it doesn’t look like you have enough material to make it around the inner circle, go back and untwist each pipe cleaner into smaller “bubbles”. Try puffing out the burlap as you go.
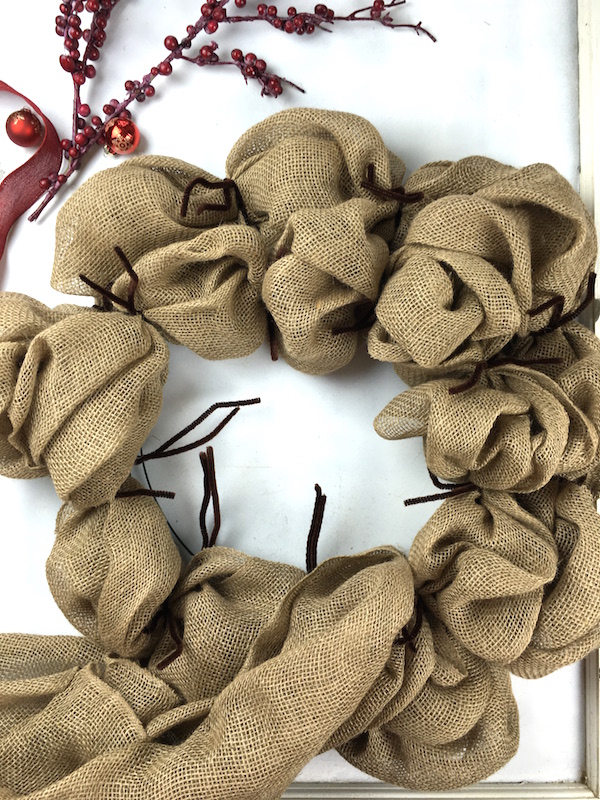
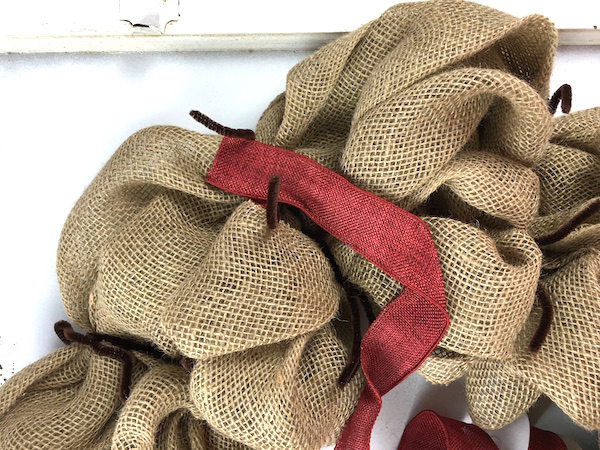
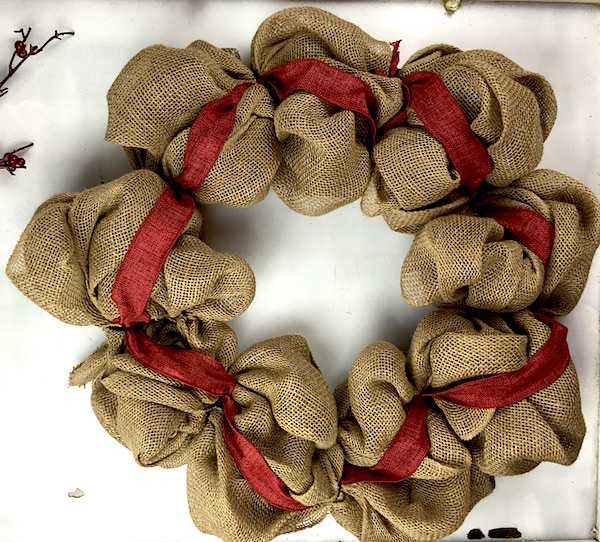
6. Once you’ve completed the inner ring, cut off your remaining burlap fabric and secure under the closest pipe cleaner. If you’d like to add colored ribbon to your wreath start the ribbon at an outer pipe cleaner. Unwrap the pipe cleaner that has burlap fabric and place ribbon and burlap in the same pipe cleaner. String the ribbon to an inside pipe cleaner. Repeating in a “zig-zag” form around the entire wreath and securing in the last pipe cleaner.
Take a look at your wreath and at each pipe cleaner intersection you will pull the two pipe cleaners through to the back of the wreath form and twist. This will hide the pipe cleaners from the front. Continue around entire back of the wreath.
You’ve now learned how to make a burlap wreath, completed your own DIY project, and you can use a hot glue gun and glue sticks to secure your poinsettia flowers, ornaments, and adornments.
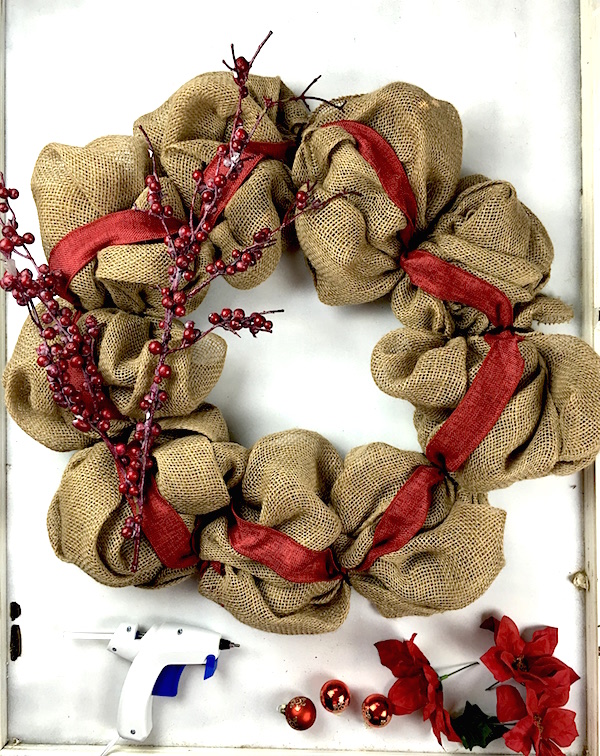
Tie extra ribbon around your wreath and load up your handmade burlap wreath to pass around at the office white elephant gift exchange or keep it for yourself to hang in your holiday home!
Are you ready to start selling your handmade craft projects?
Download our free PDF: Etsy 101: A Guide to Getting Started! This comprehensive collection of notes, worksheets, and slides from Marlo Miyashiro’s class, Etsy 101: Launch Your Handmade Shop gives you the tips and insights you need to launch a successful Etsy shop!