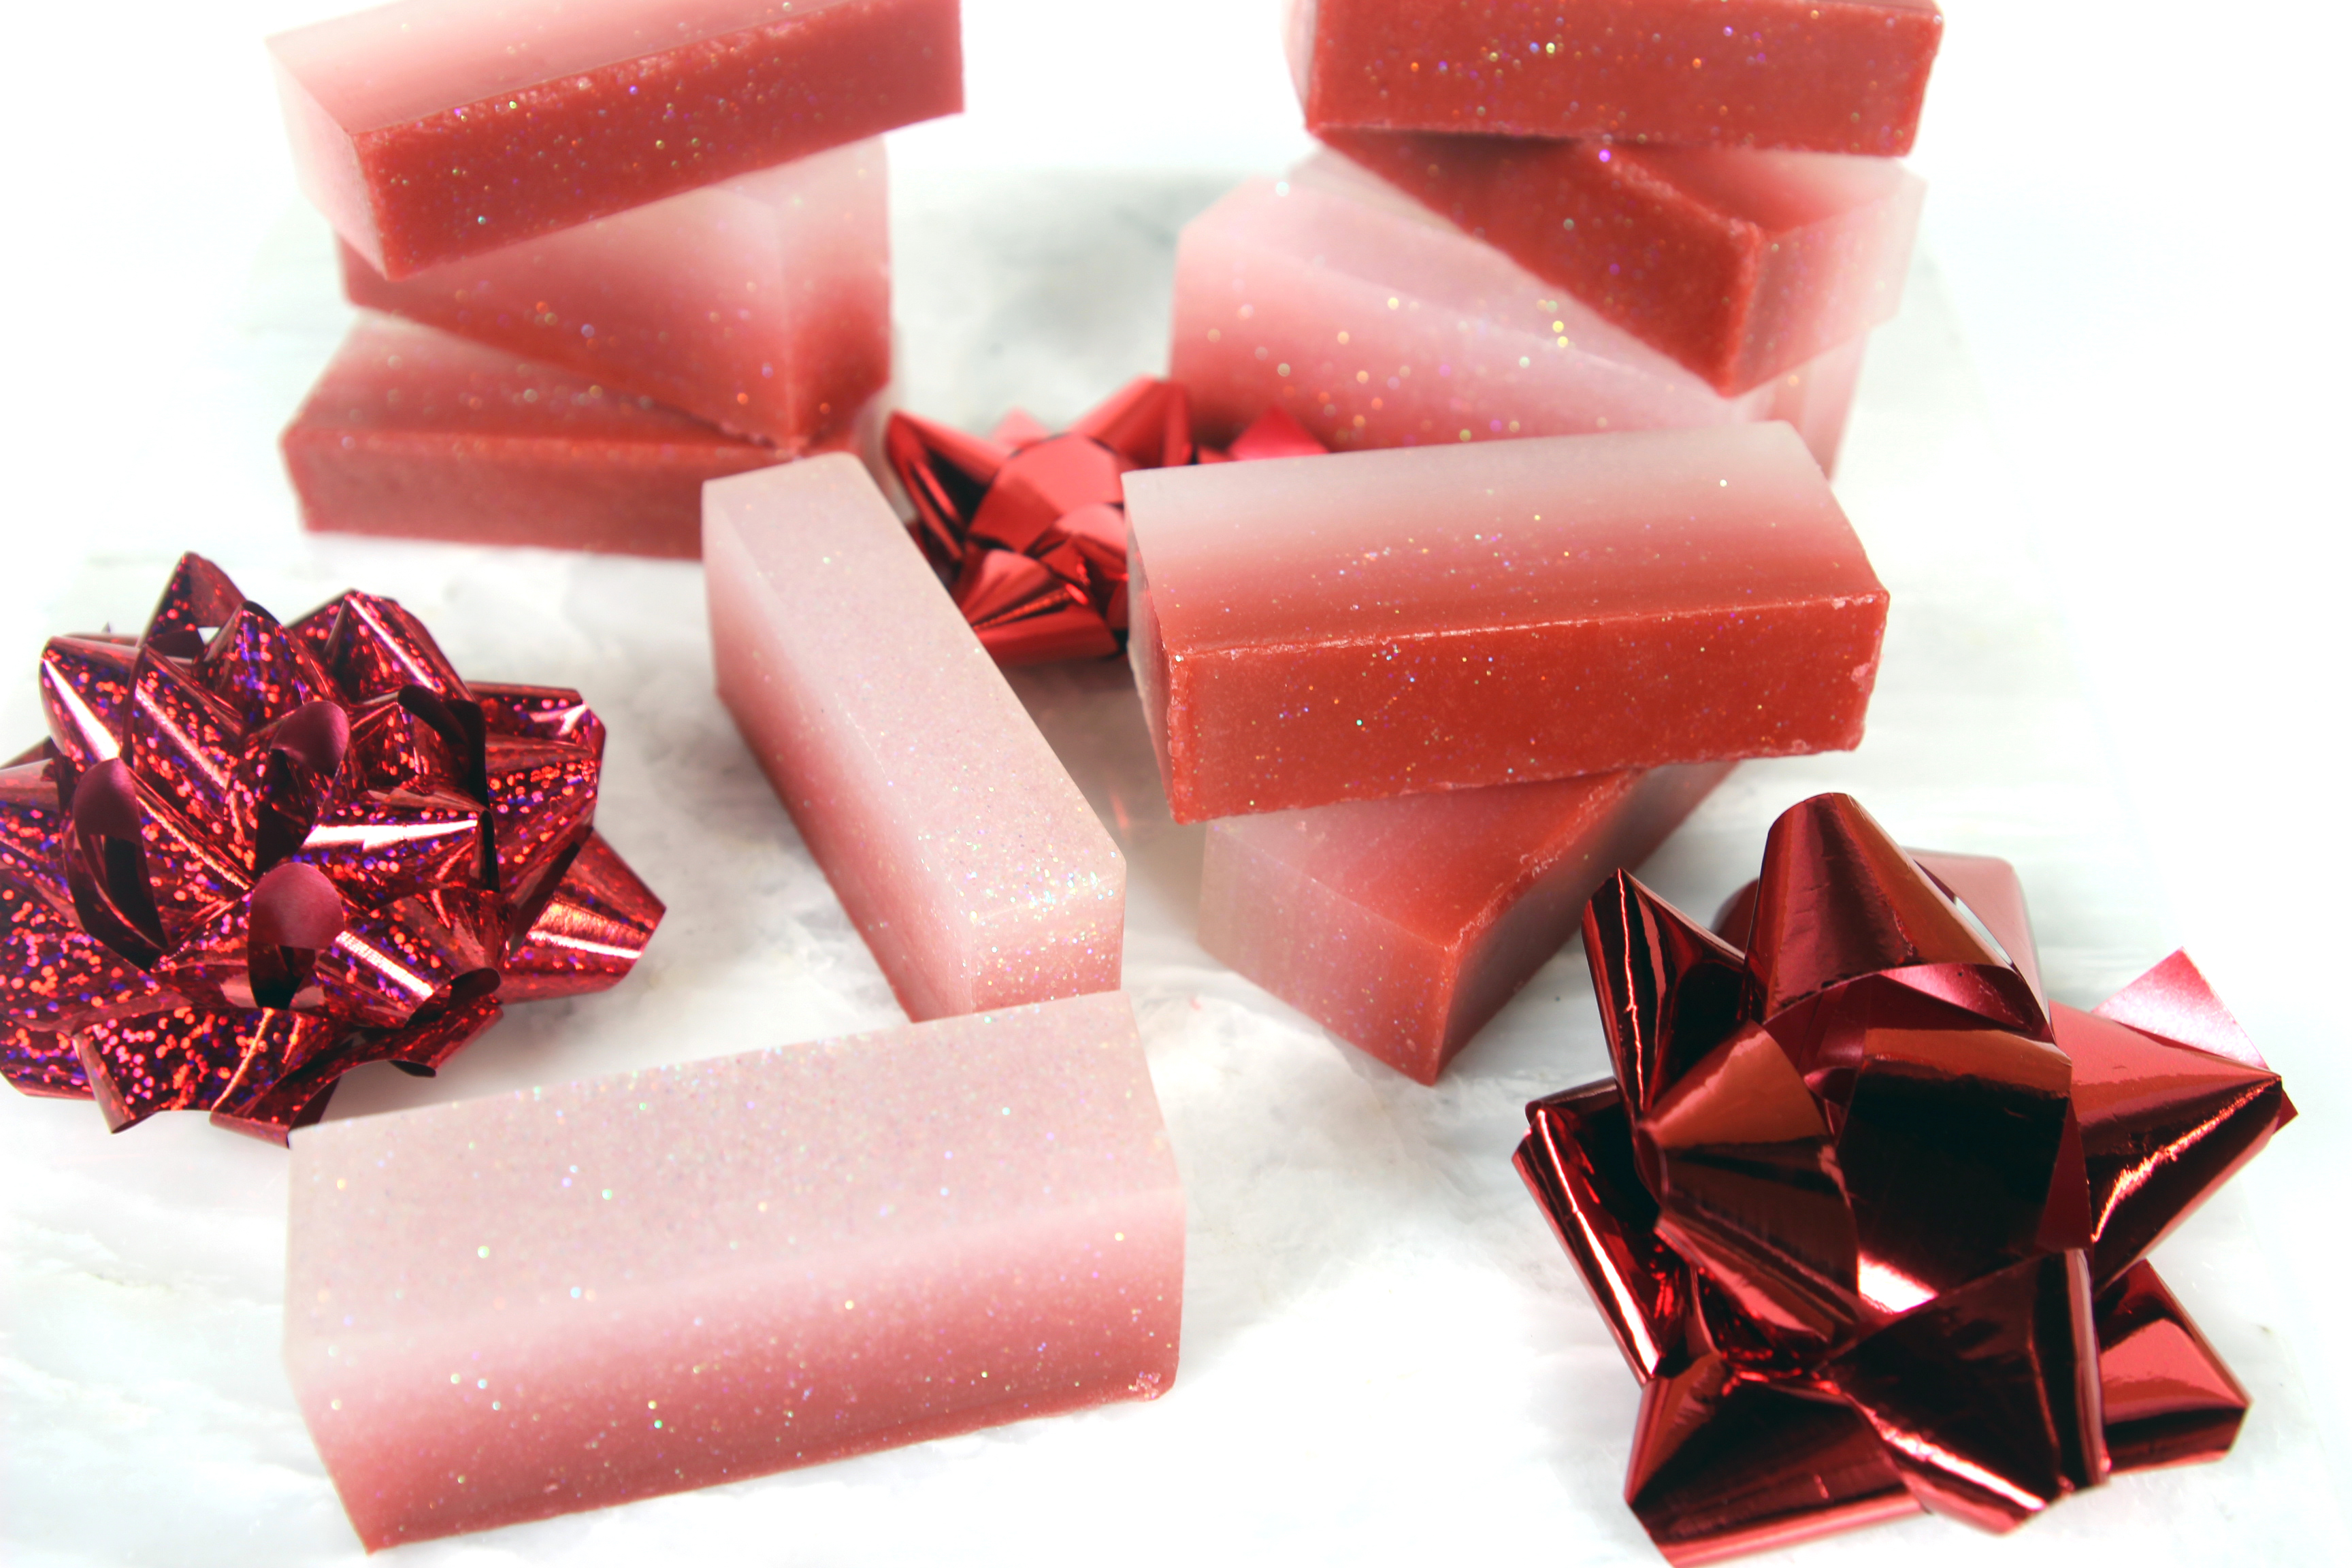
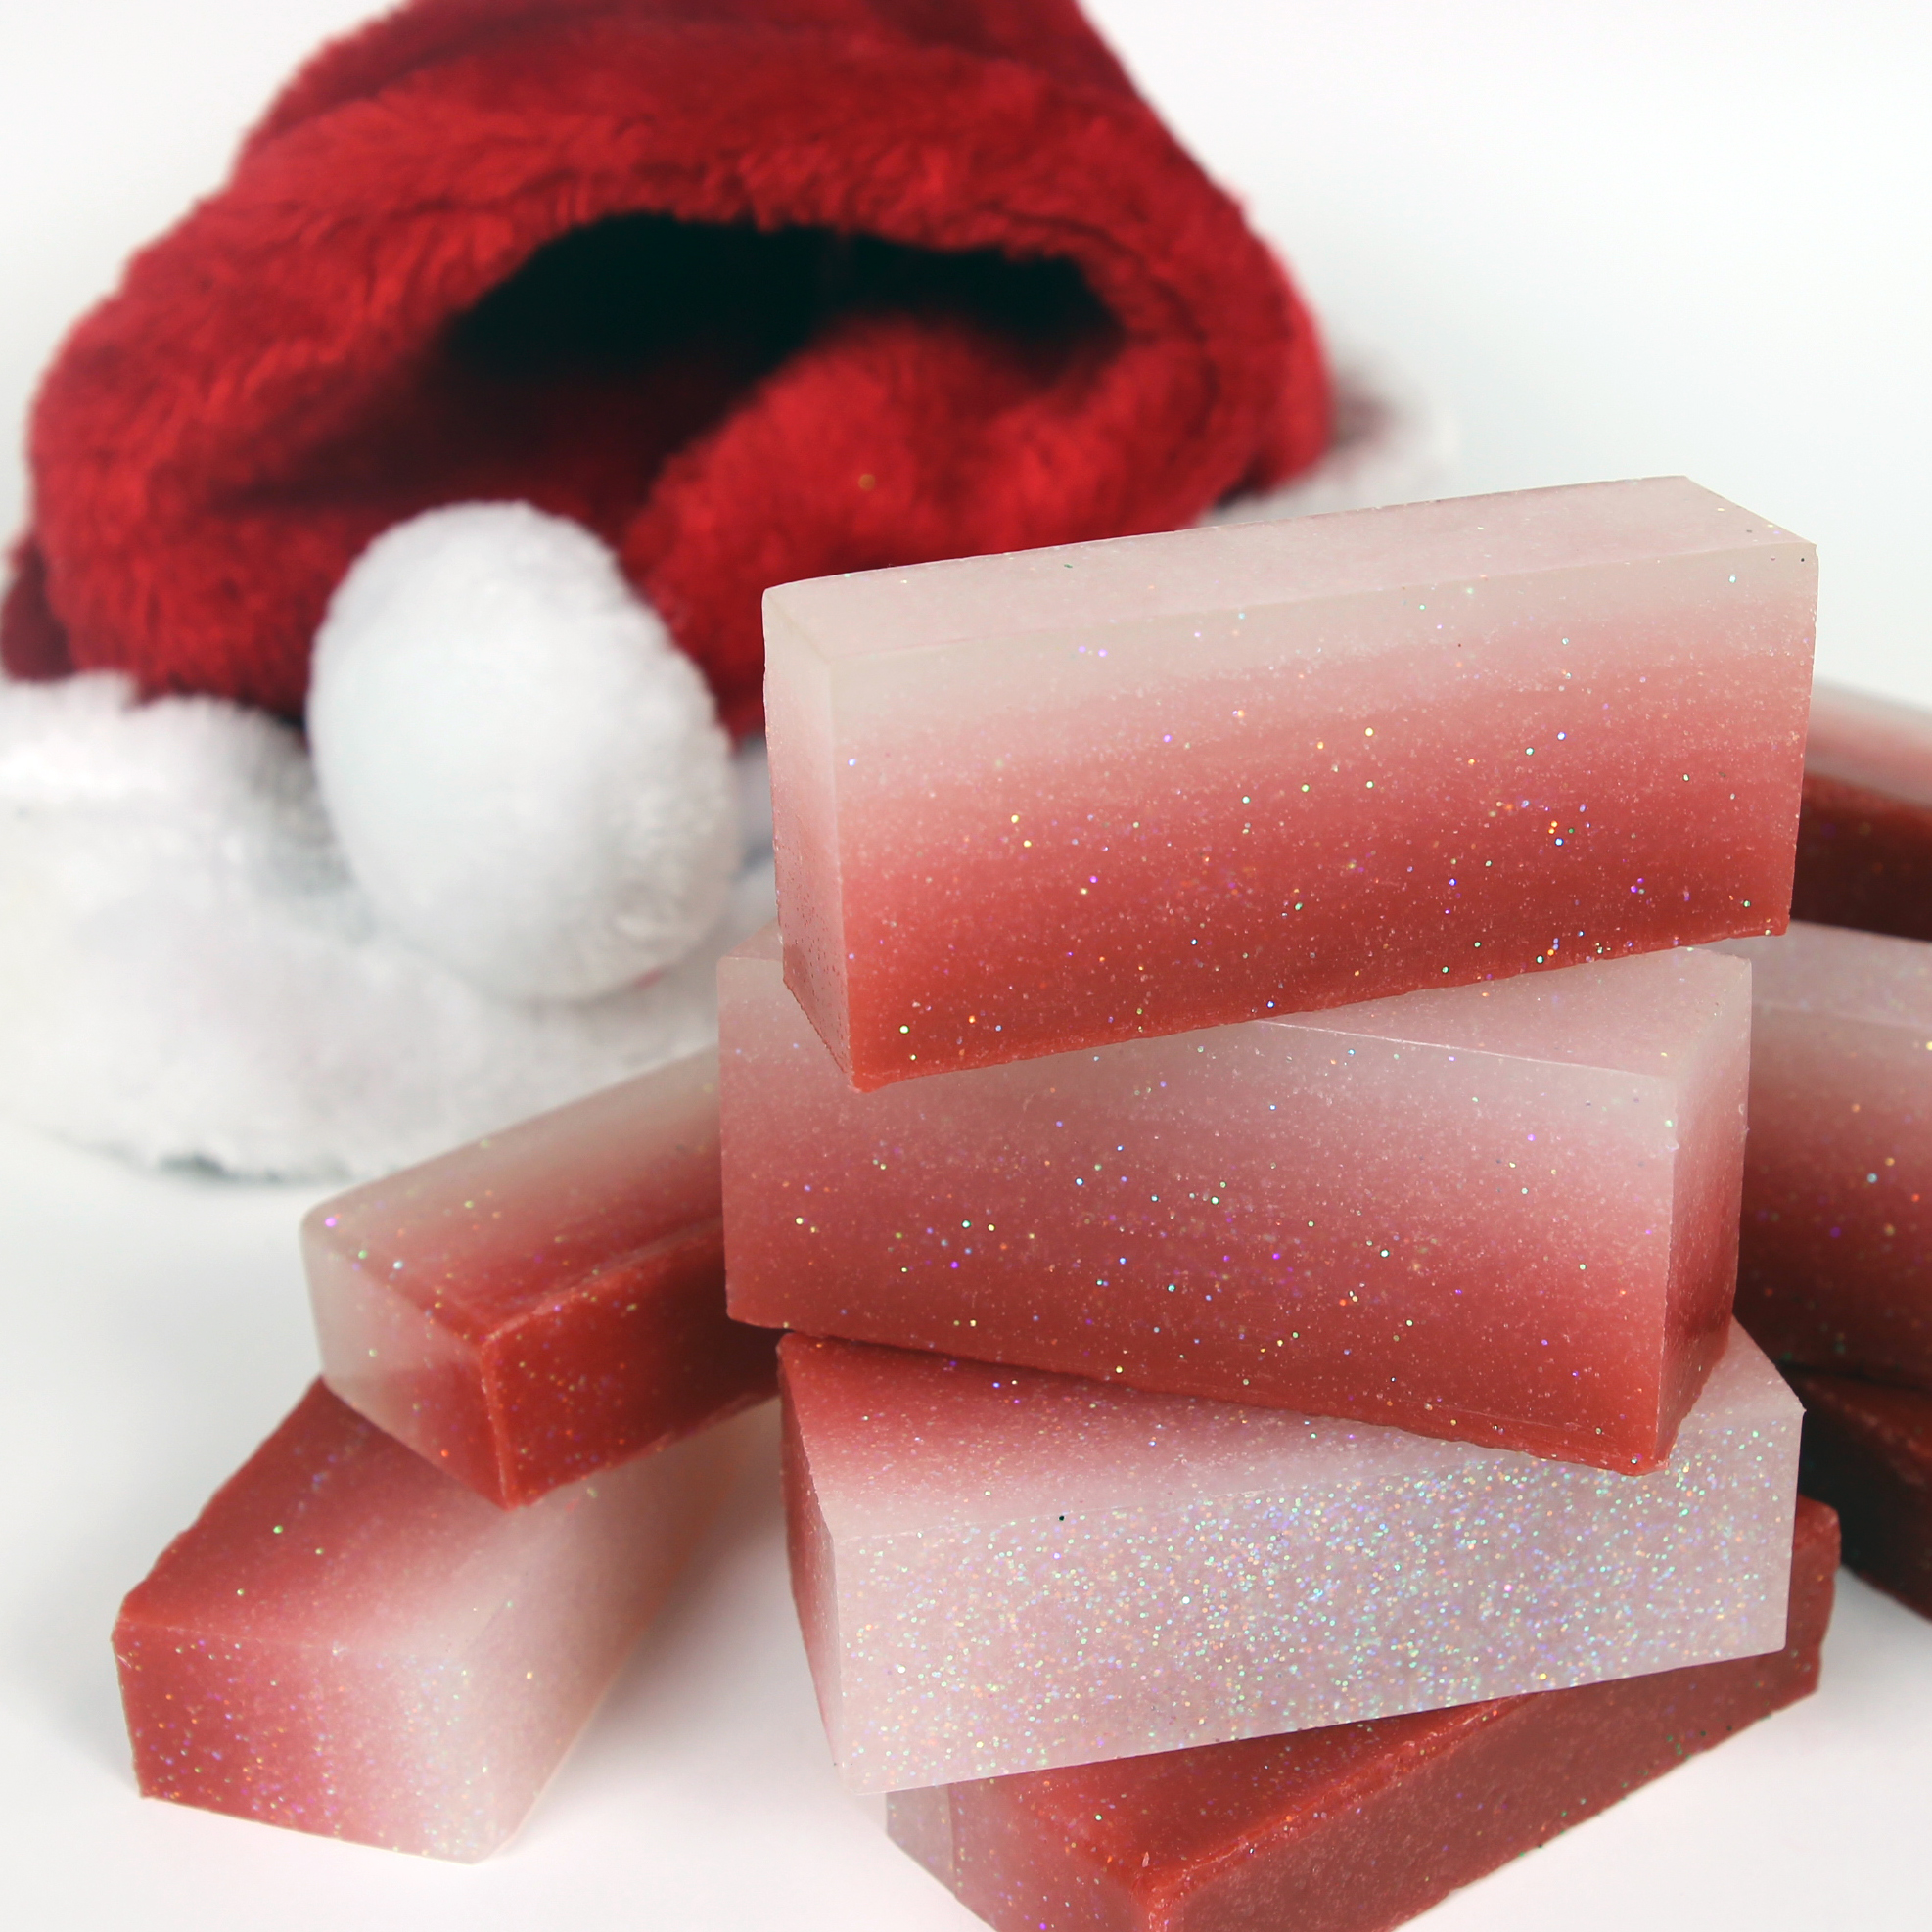
‘Tis the season to be merry and crafty with Applejack Peel melt and pour soap! This easy DIY soap recipe has a WOW factor that will make perfect stocking stuffers, hostess gifts, or party favors at your upcoming holiday bash.
Ingredients for this project can be purchased at Bramble Berry or you sign up for a Handmade Beauty Box subscription to receive DIY beauty and spa projects like this every month!
Difficulty: Beginner, Time: 30 minutes, Yields: 2 pounds of soap
Ingredients:
2 lbs Stephenson Suspending Melt and Pour Base
10” Silicone Soap Mold
1 oz Applejack Peel Fragrance Oil
.3 oz Iridescent glitter
1 Non-Bleeding Perfect Red Color Block
Rubbing alcohol in spray bottle
Dropper
What you’ll need from home:
1 medium heat safe container
1 spoon
Knife
Measuring spoons
Paper towels
Plastic wrap
Rubbing alcohol in spray bottle
Candy thermometer or temperature gun (optional)
Prep: Fill the spray bottle with rubbing alcohol. This will be used to eliminate air bubbles and help the soap layers stick together.

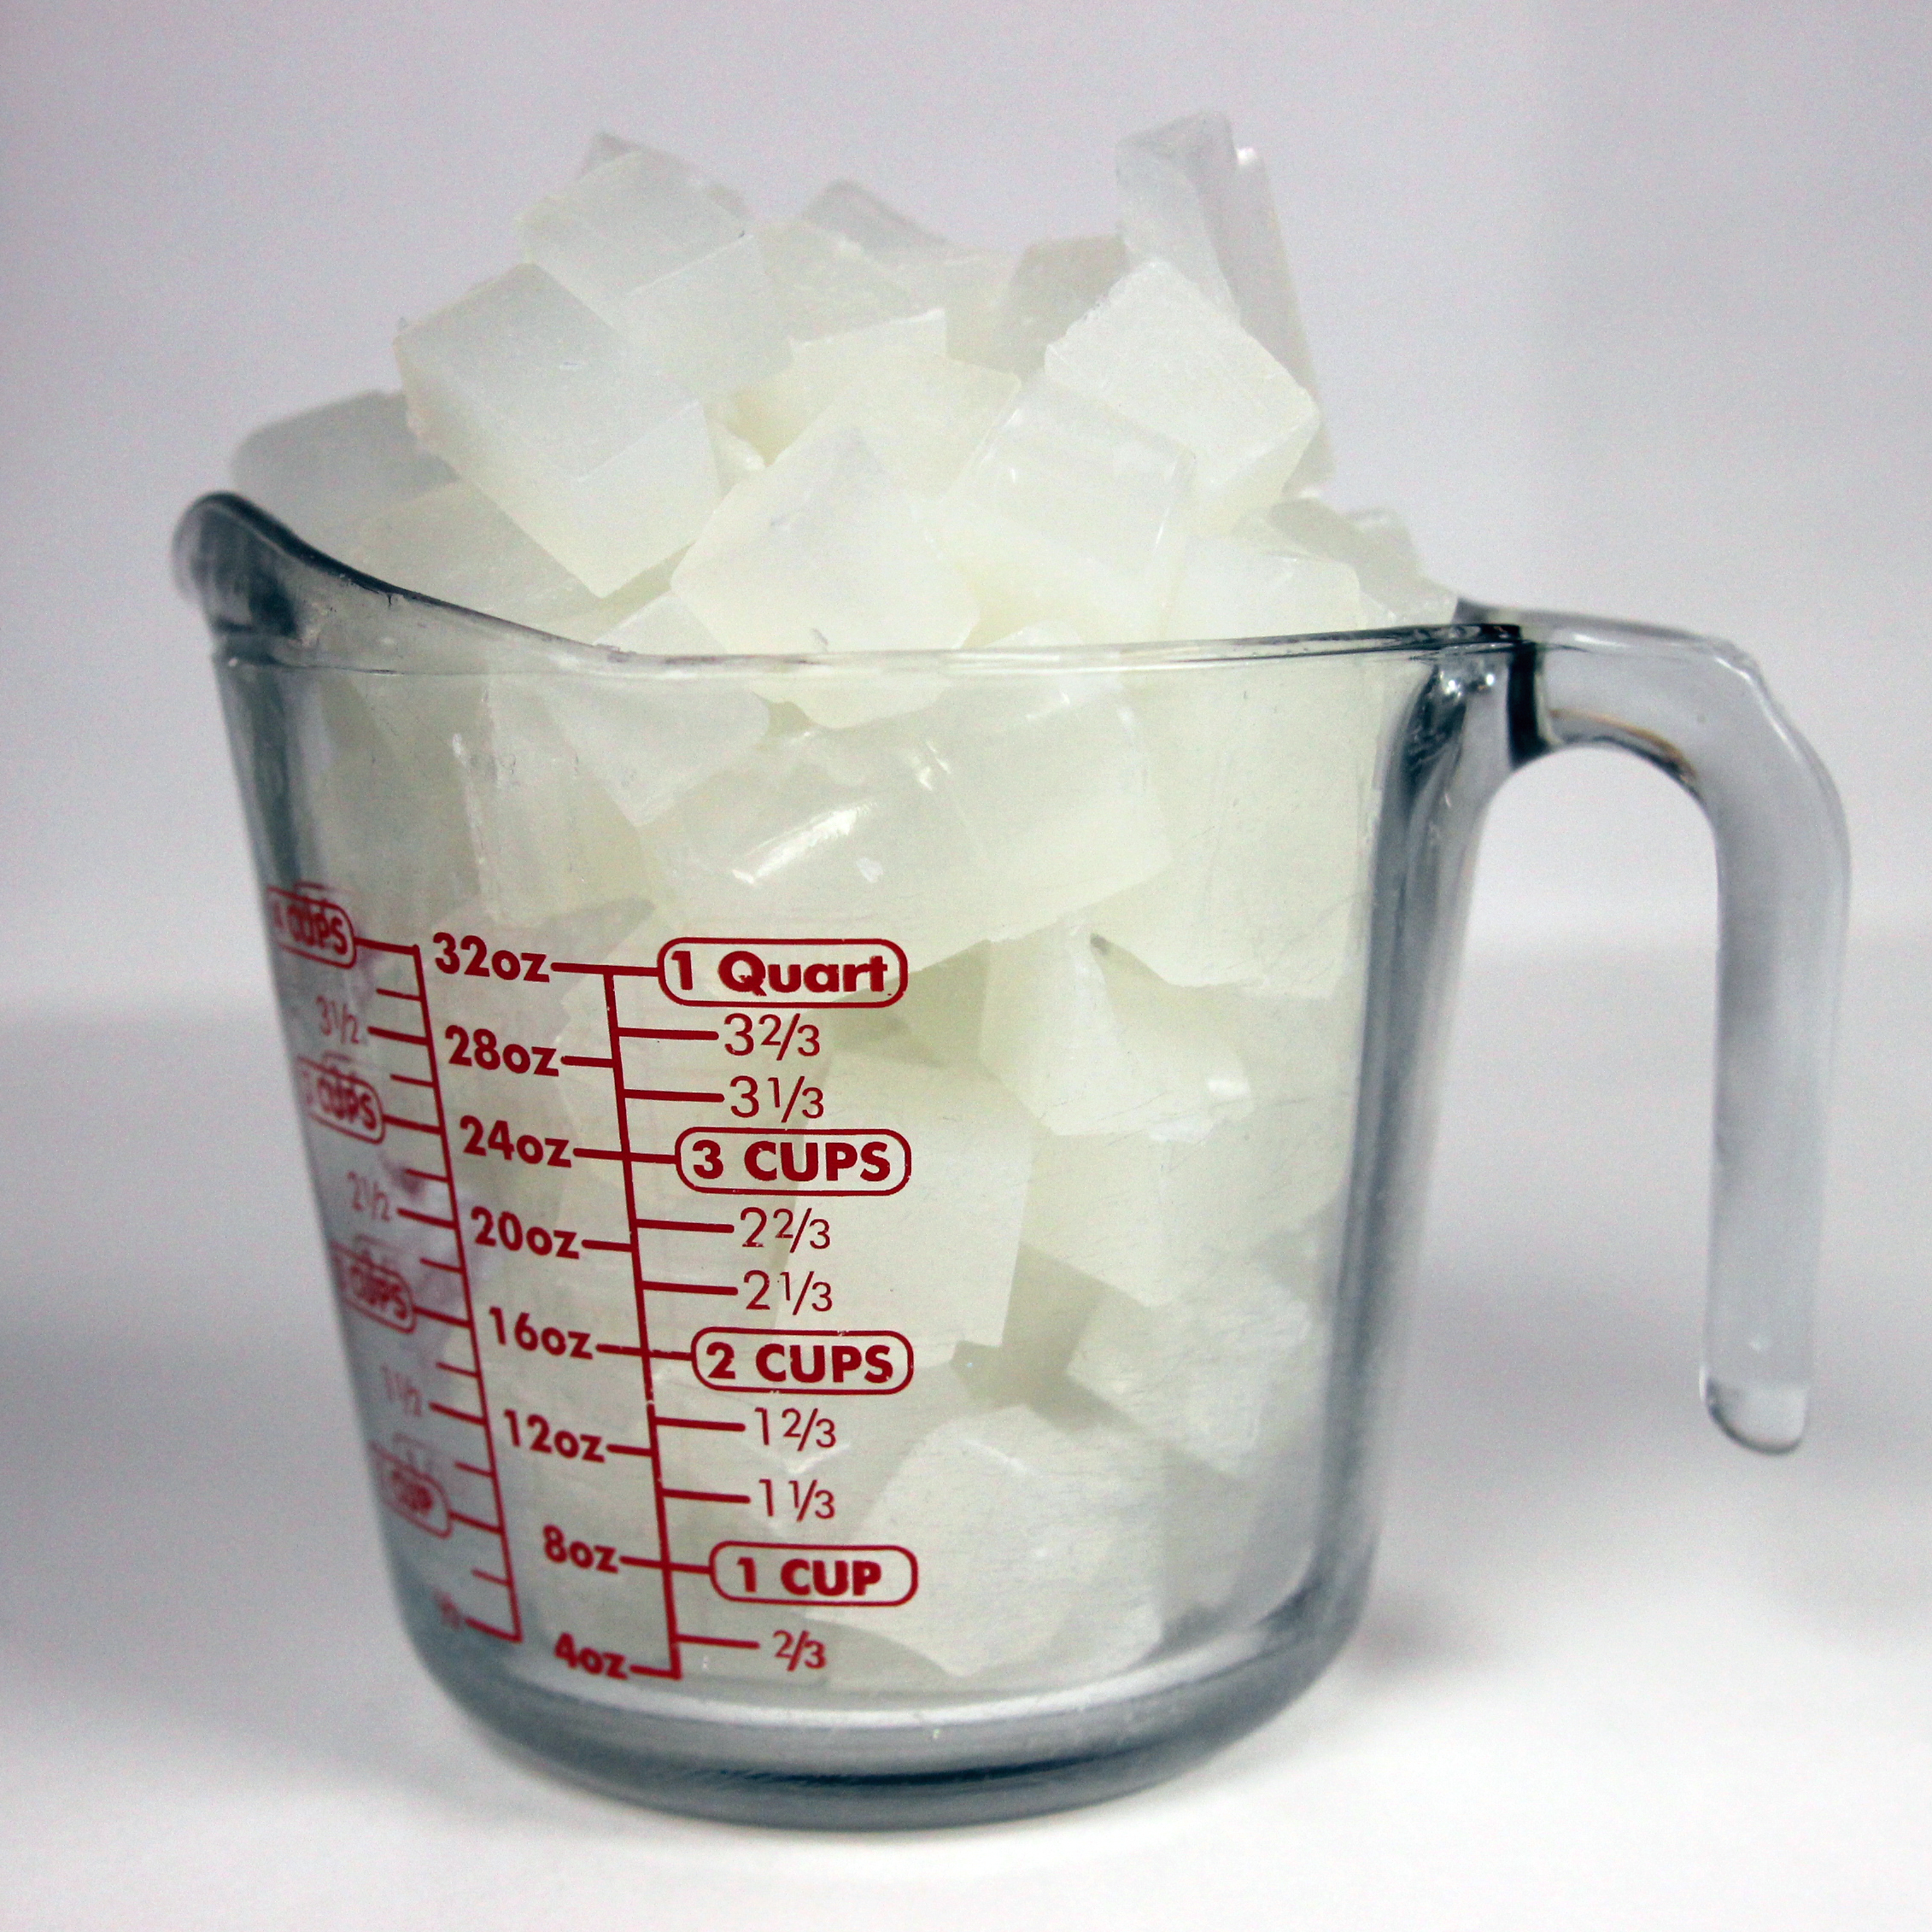
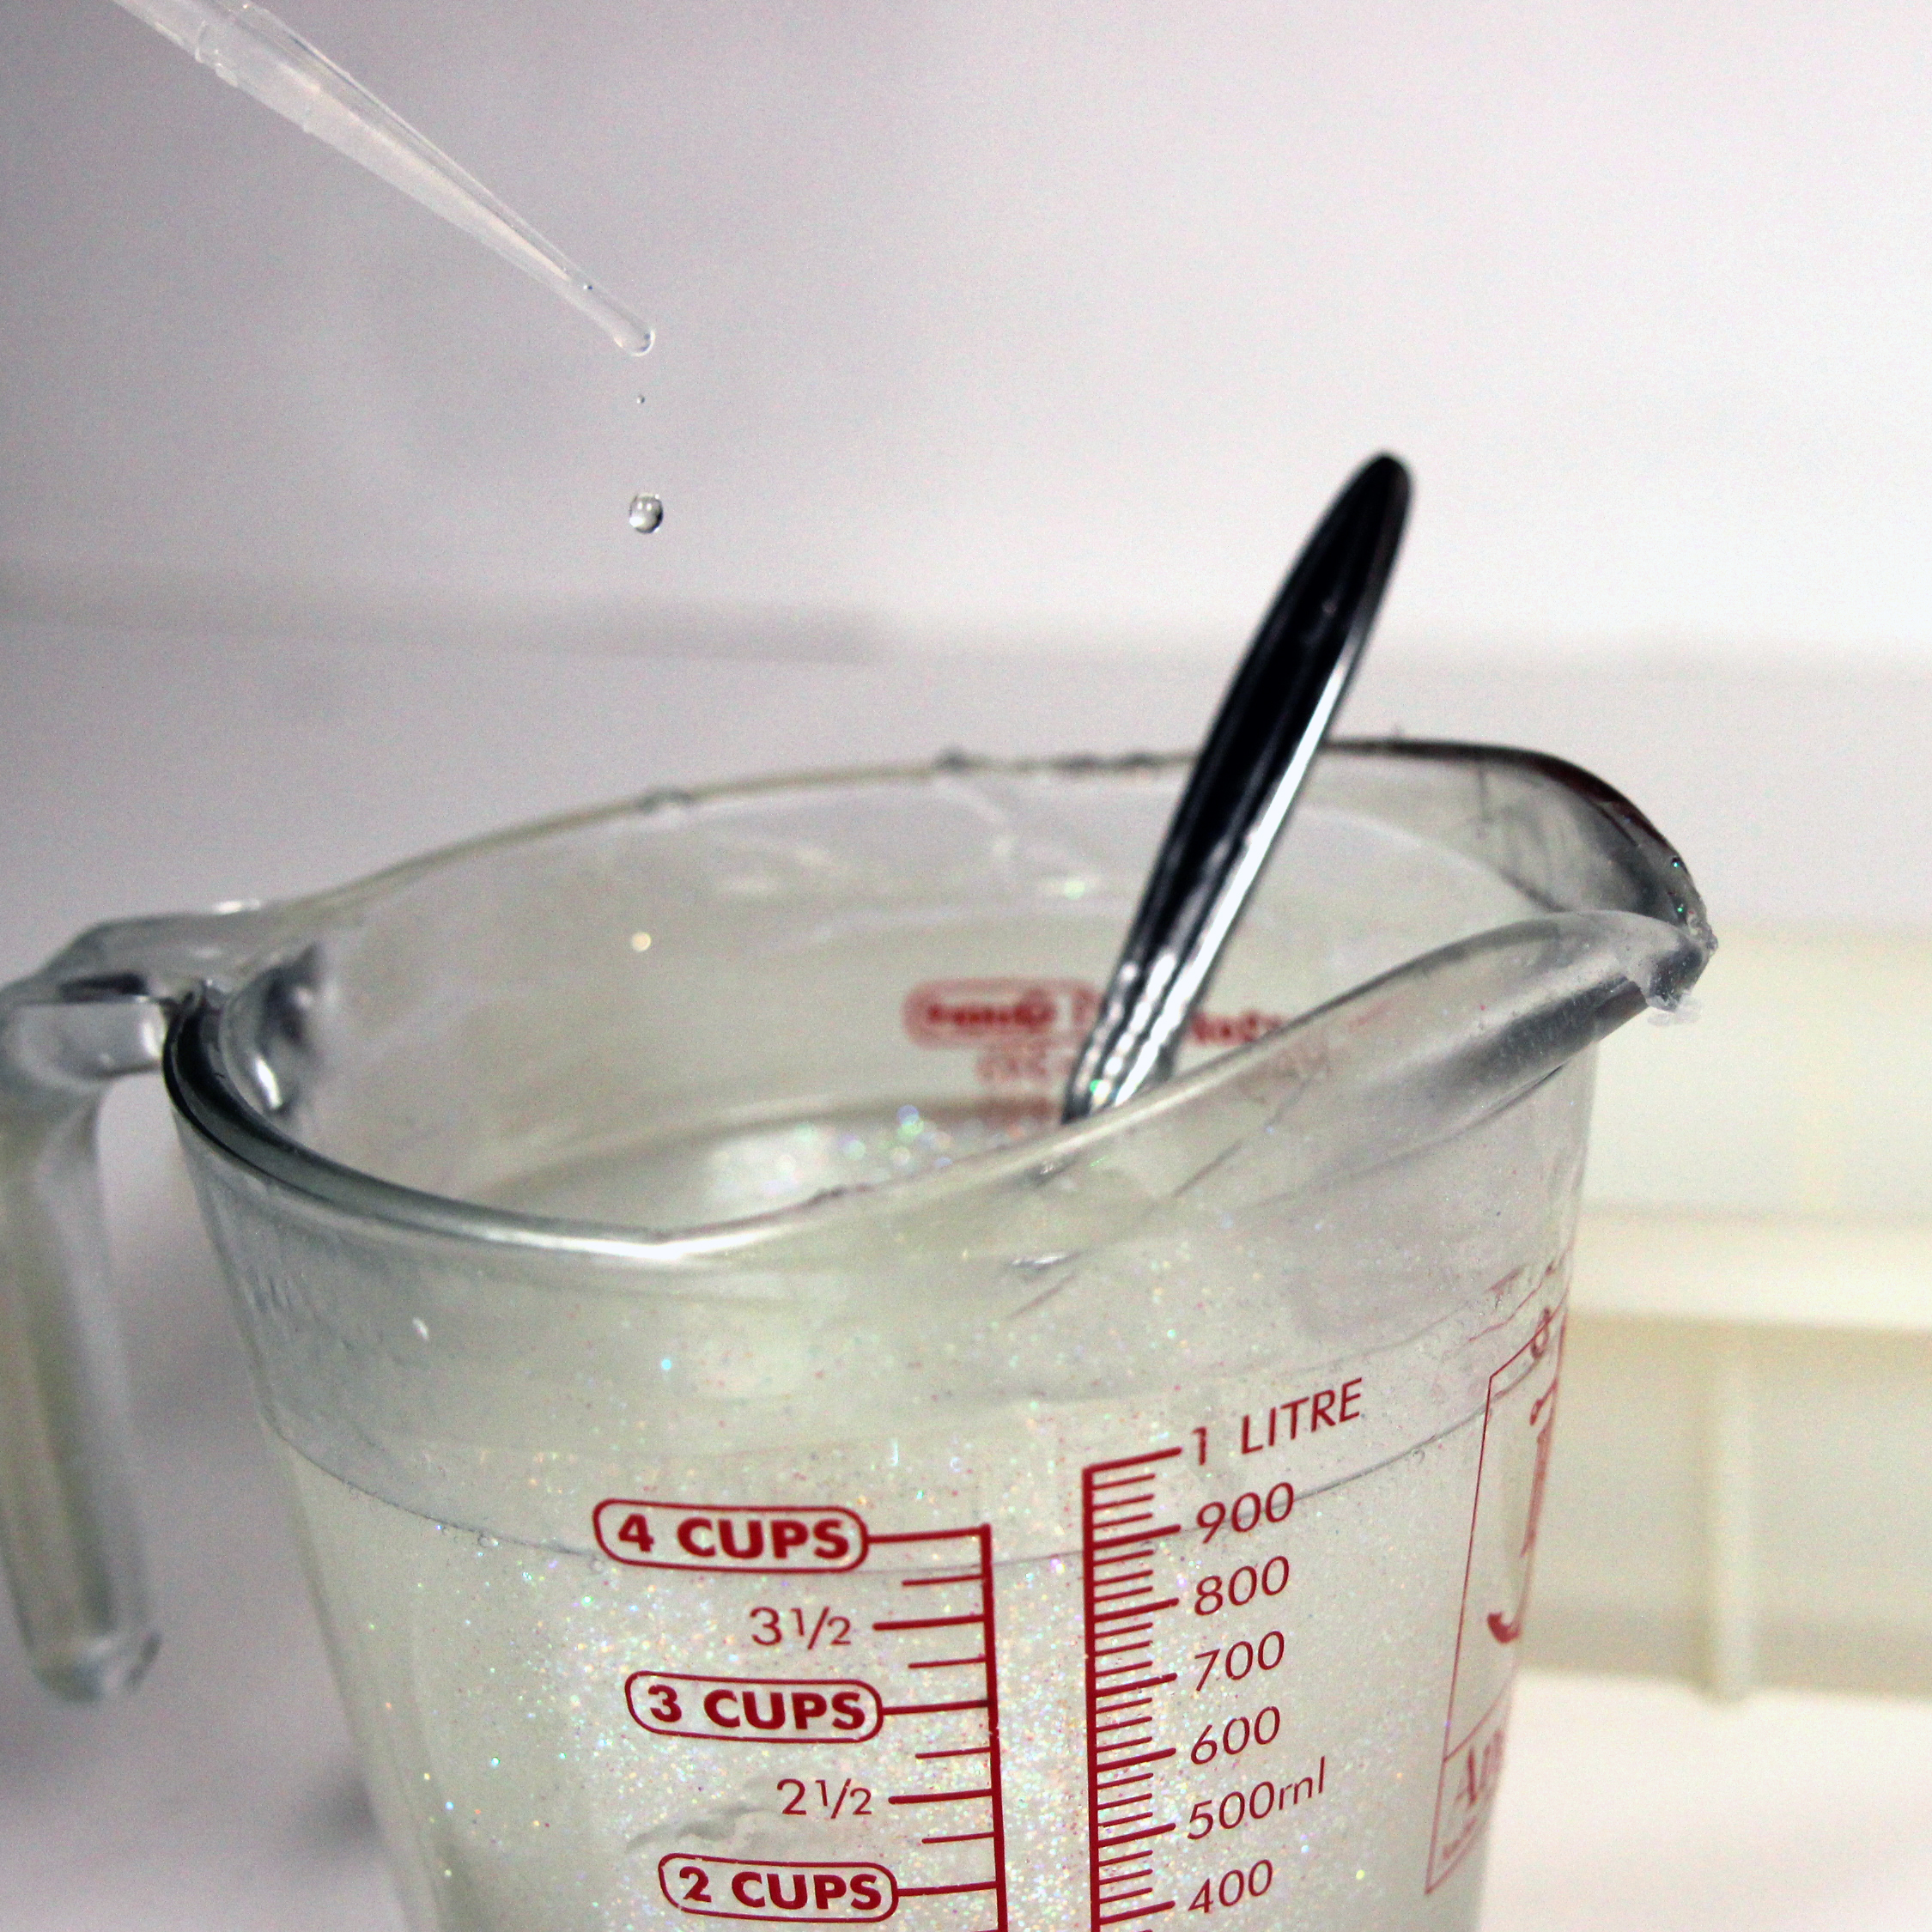
ONE: Open the plastic container of soap and pop out the big block of soap. Cut the entire soap base into 1” cubes. Place the chopped soap into your heat safe container and melt the soap in the microwave on 30 second bursts, stirring in between bursts with a spoon, until the soap is fully melted.
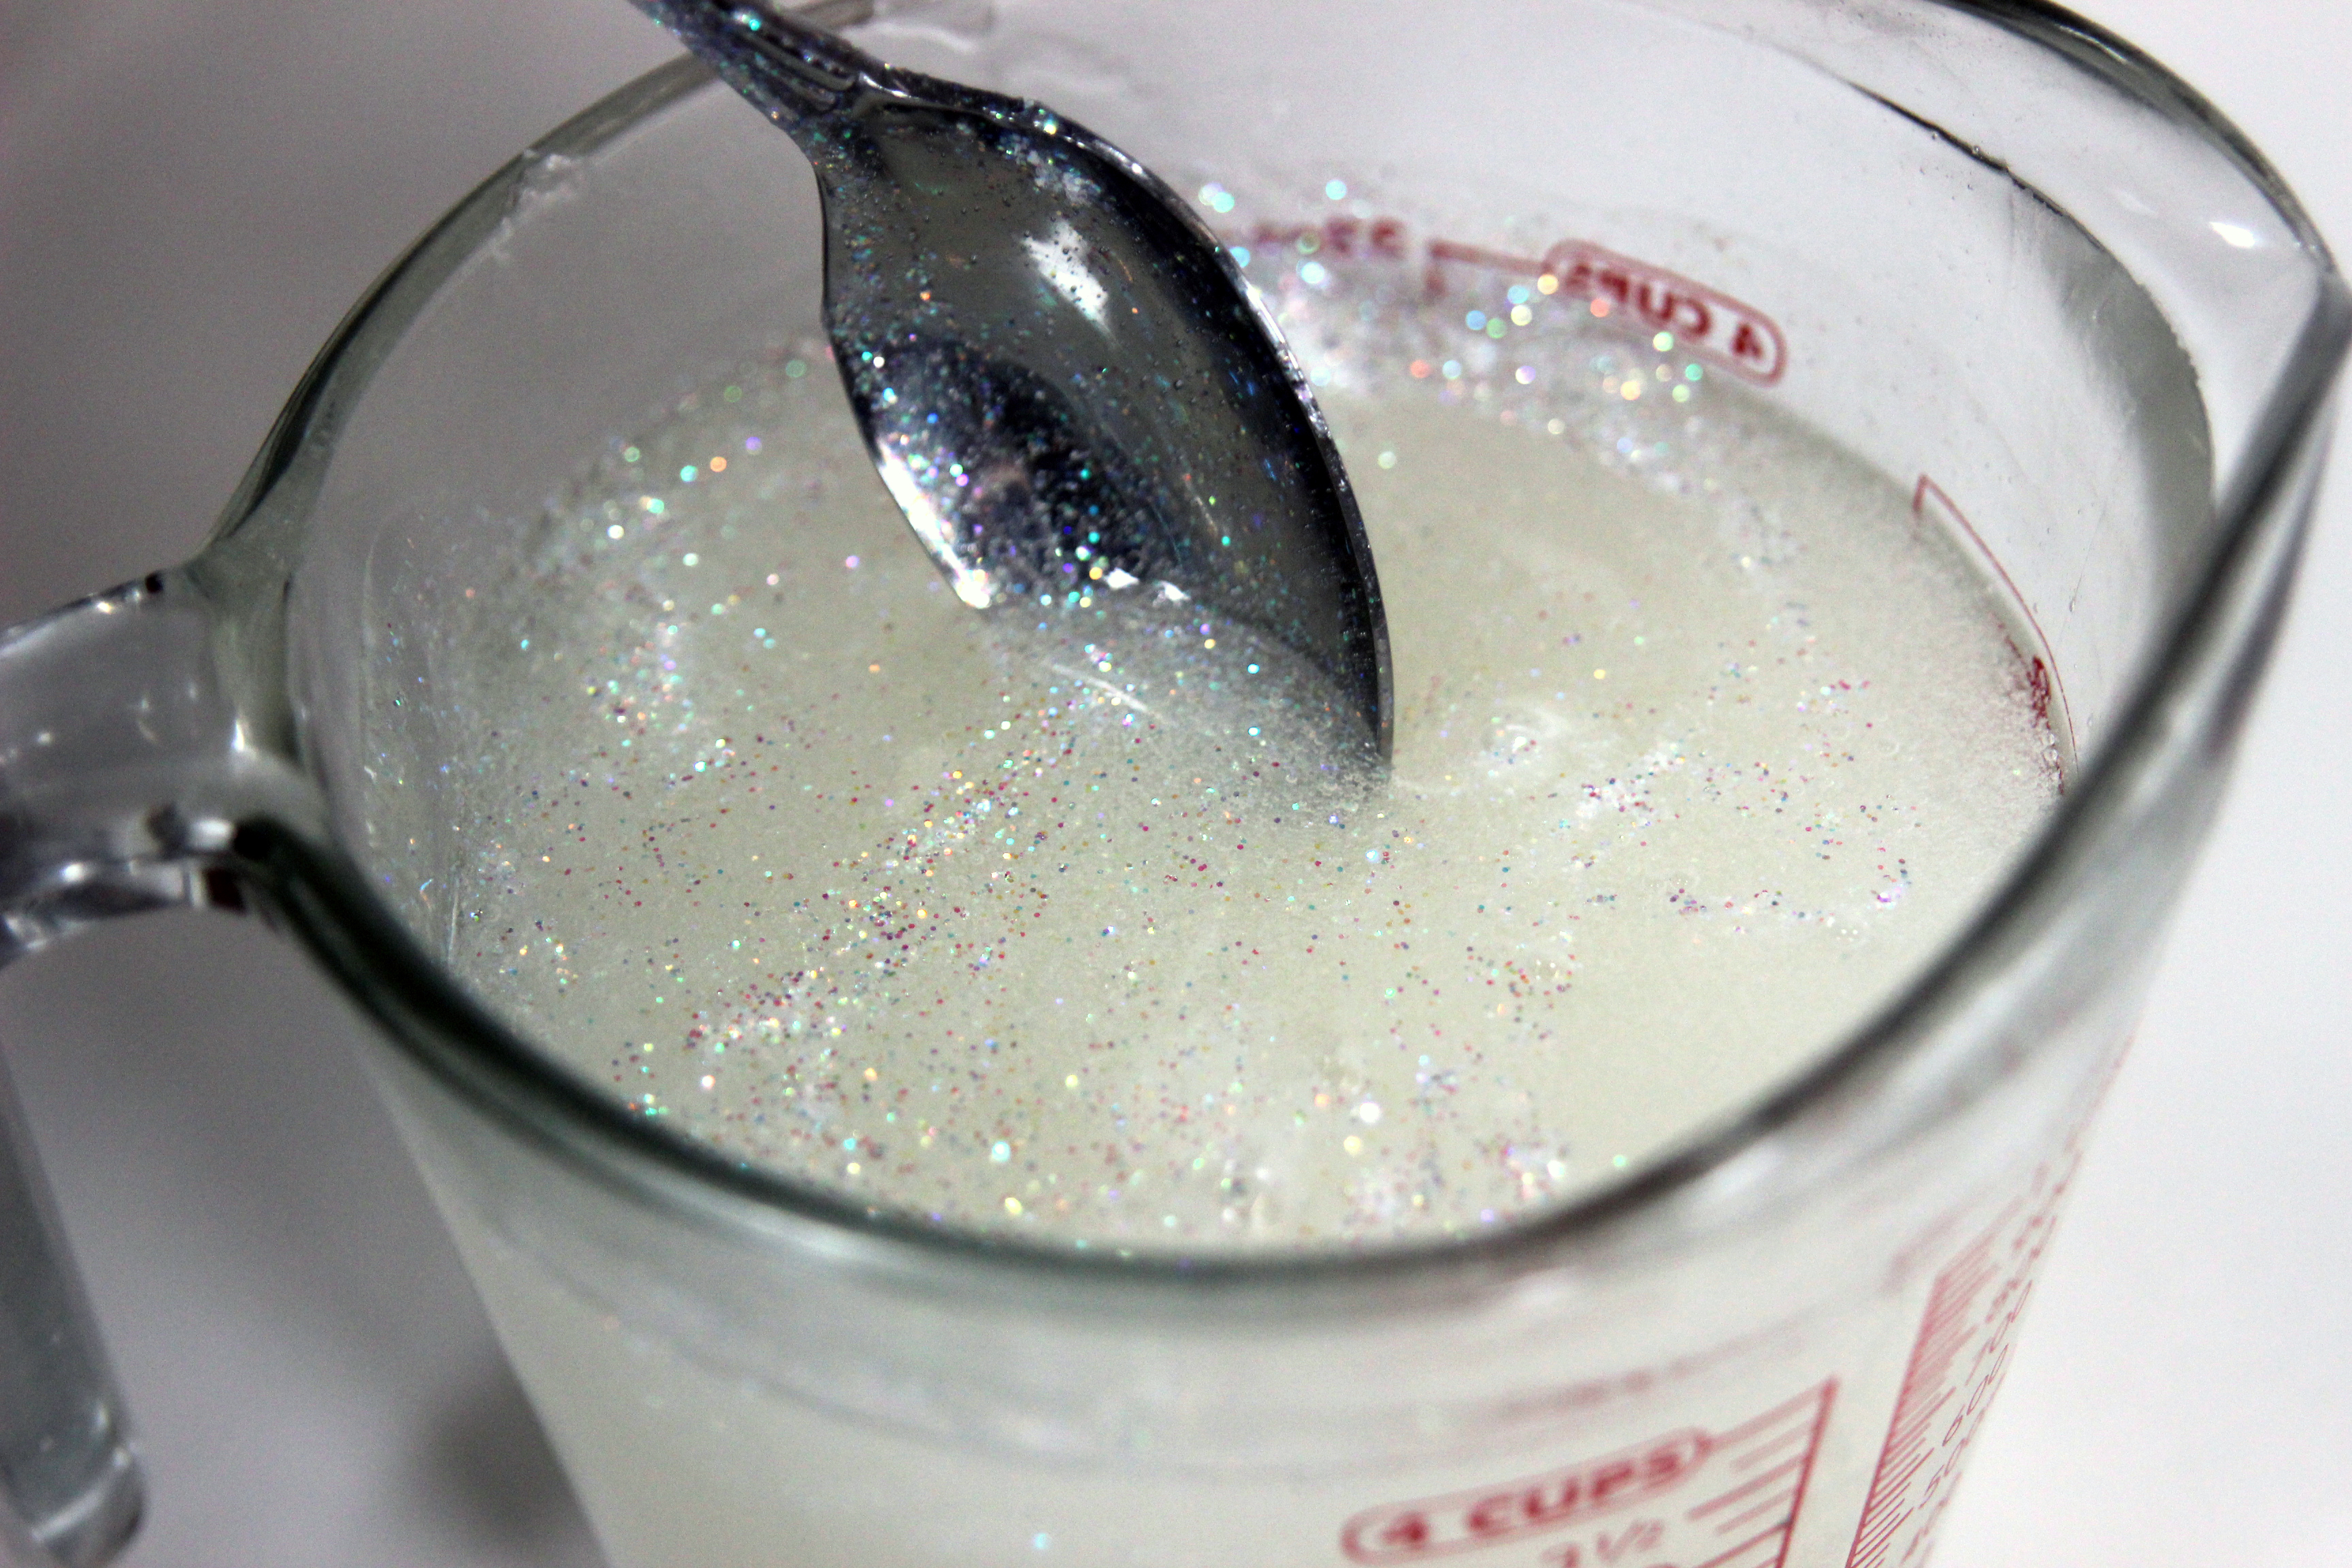
TWO: Once the soap is fully melted add 1.5 teaspoons of skin safe glitter and 9 ml of Applejack Peel Fragrance Oil (or any skin safe fragrance oil of your choice). Mix well.
THREE: Pour a thin layer of the soap into your mold and spritz with rubbing alcohol to eliminate air bubbles. This layer should be just enough soap to cover the bottom of the mold, about ½ cup. You can totally eyeball it. Let this layer cool for 5-6 minutes until it’s hard enough to support another layer of soap.
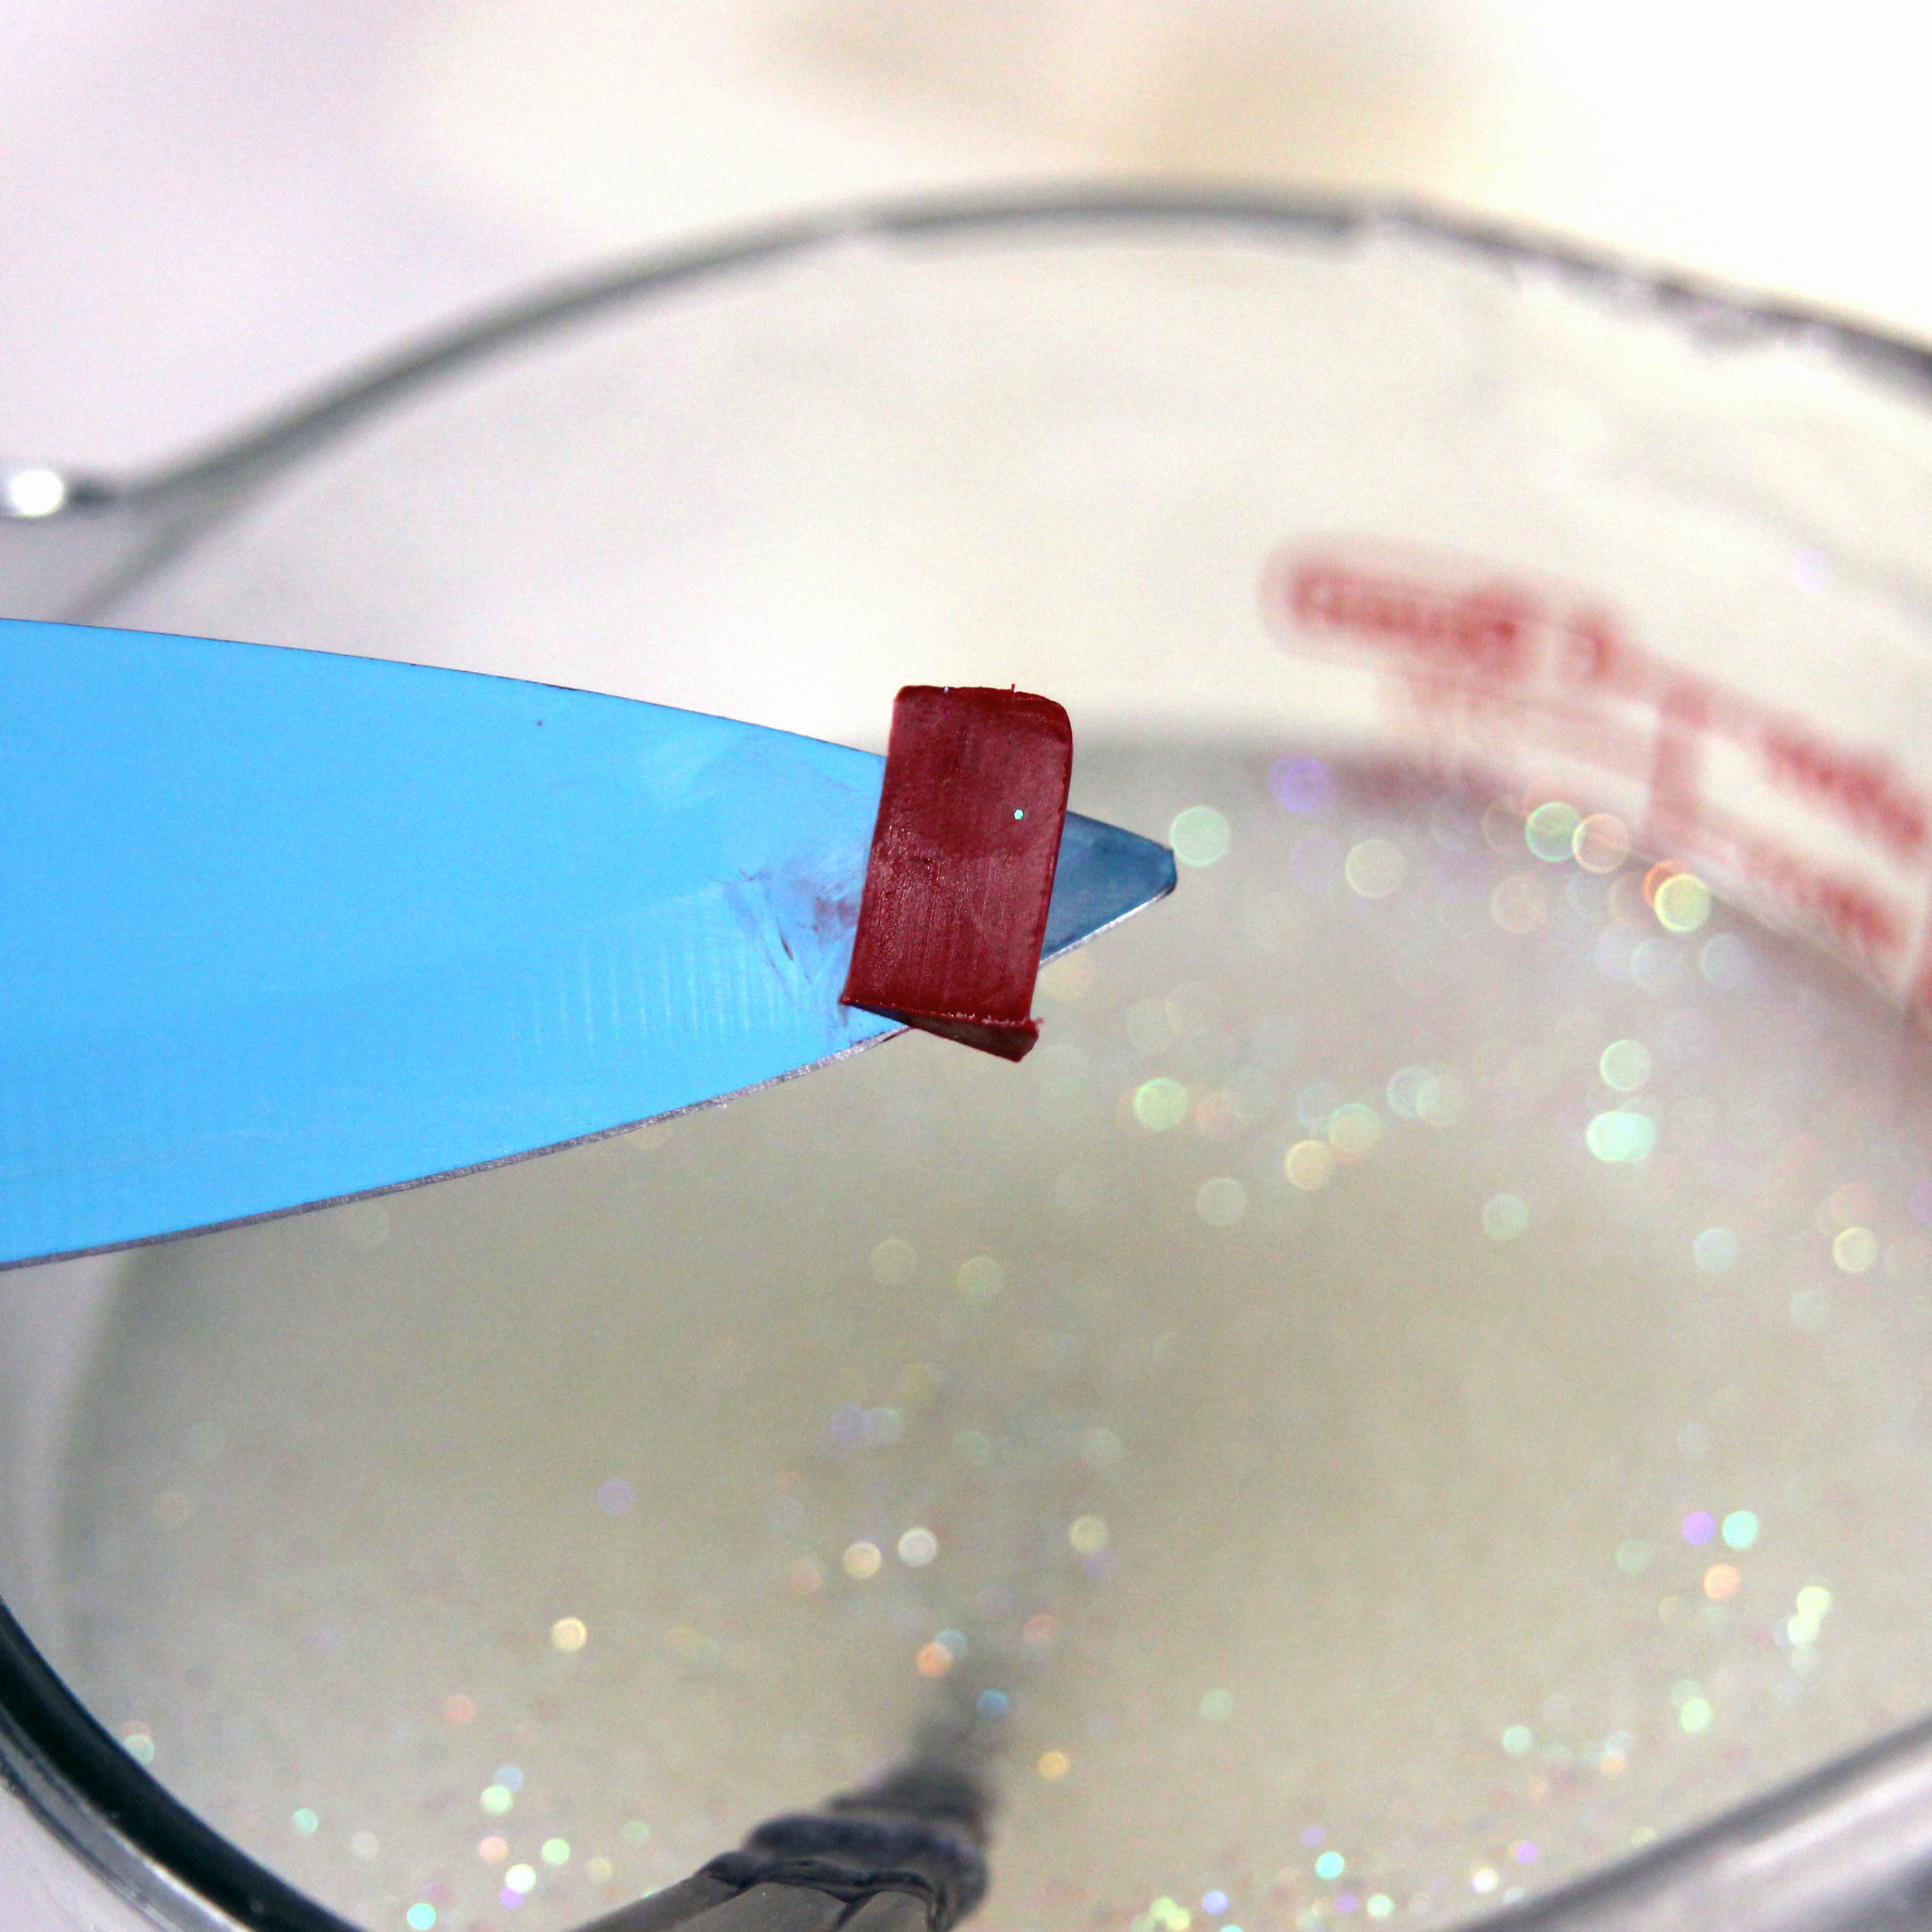
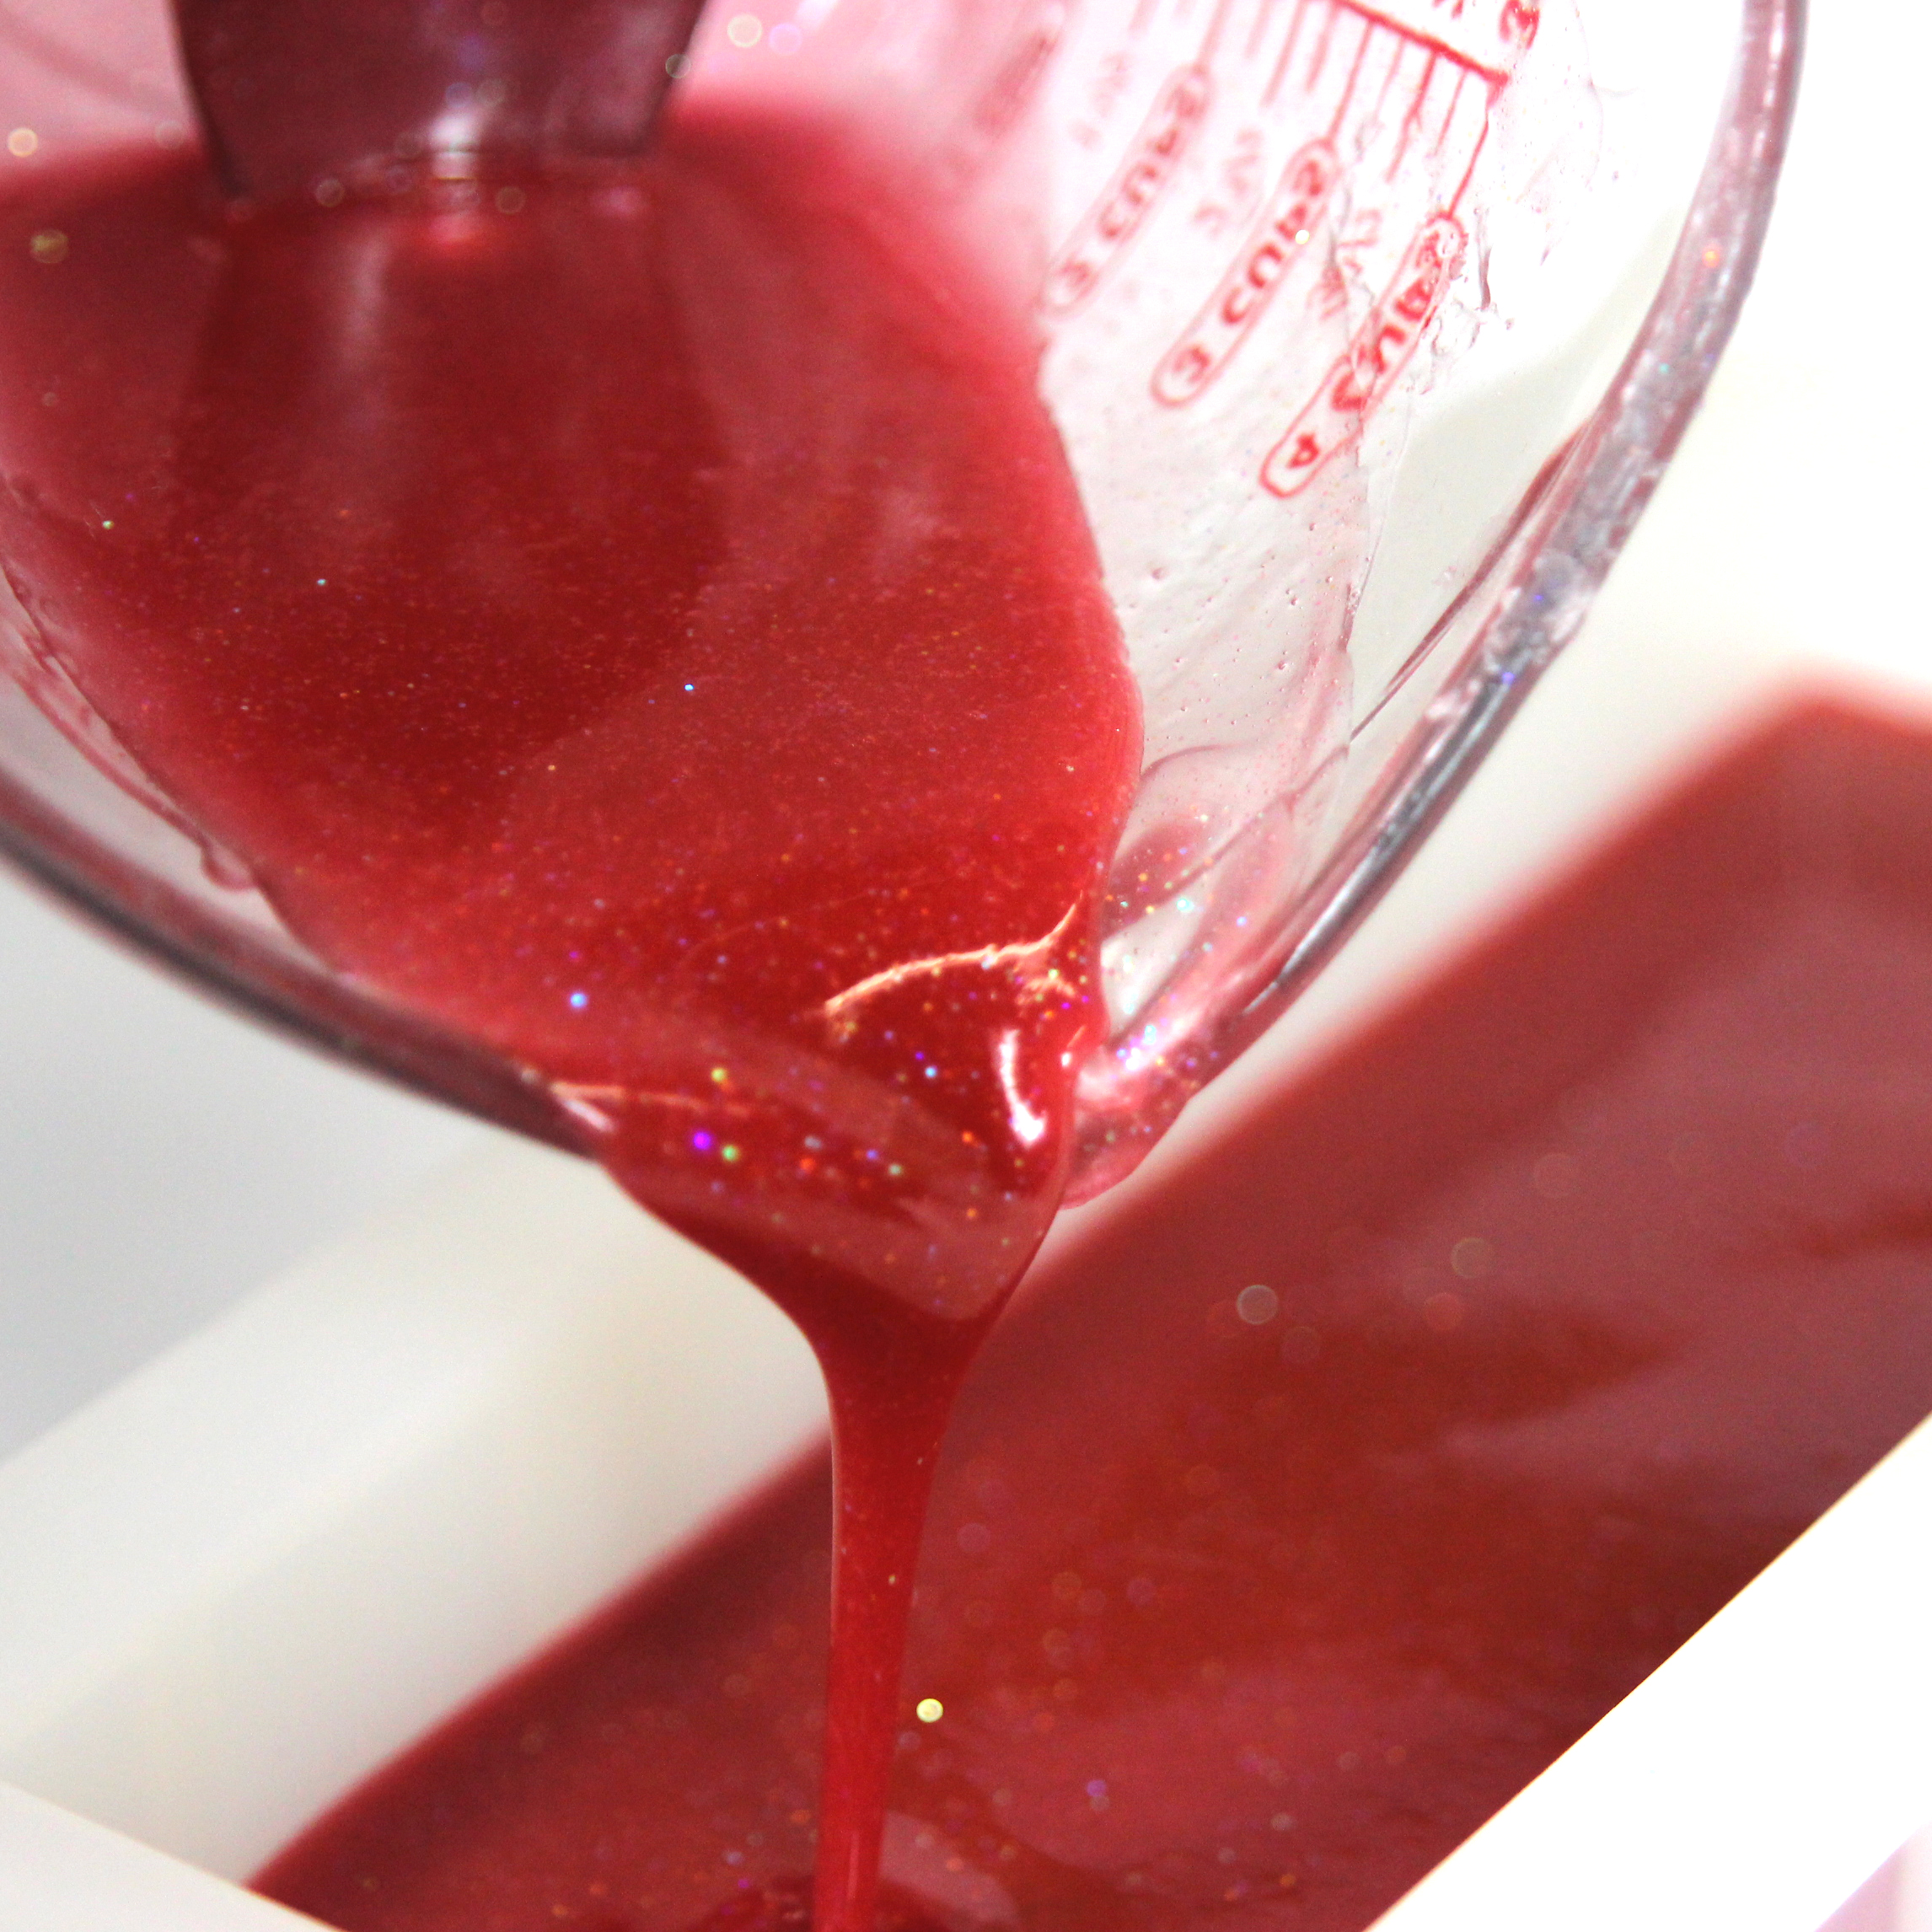
FOUR: Add a sliver of red colorant to the remaining melted soap and mix well until the colorant is fully dispersed. Remember that we’re going for an ombre’ effect, light to dark, so use a small amount of colorant in this step – we don’t want to go too dark too soon.
FIVE: After the first layer of soap has hardened, spritz that first layer with rubbing alcohol and pour your second layer of lightly colored red/pink soap on top of the first layer. Pour just enough to cover the first layer of soap, about ½ cup. Spritz with rubbing alcohol to eliminate air bubbles.

SIX: Repeat steps 4 and 5 until you’ve used up all of your soap. Add a tiny bit more color to each layer of soap to get a darker hue for each layer. You may need to reheat the soap a few times during this process while you’re waiting for your layers to dry. Make your layers as thick or thin as you want – get creative and have fun with this design!
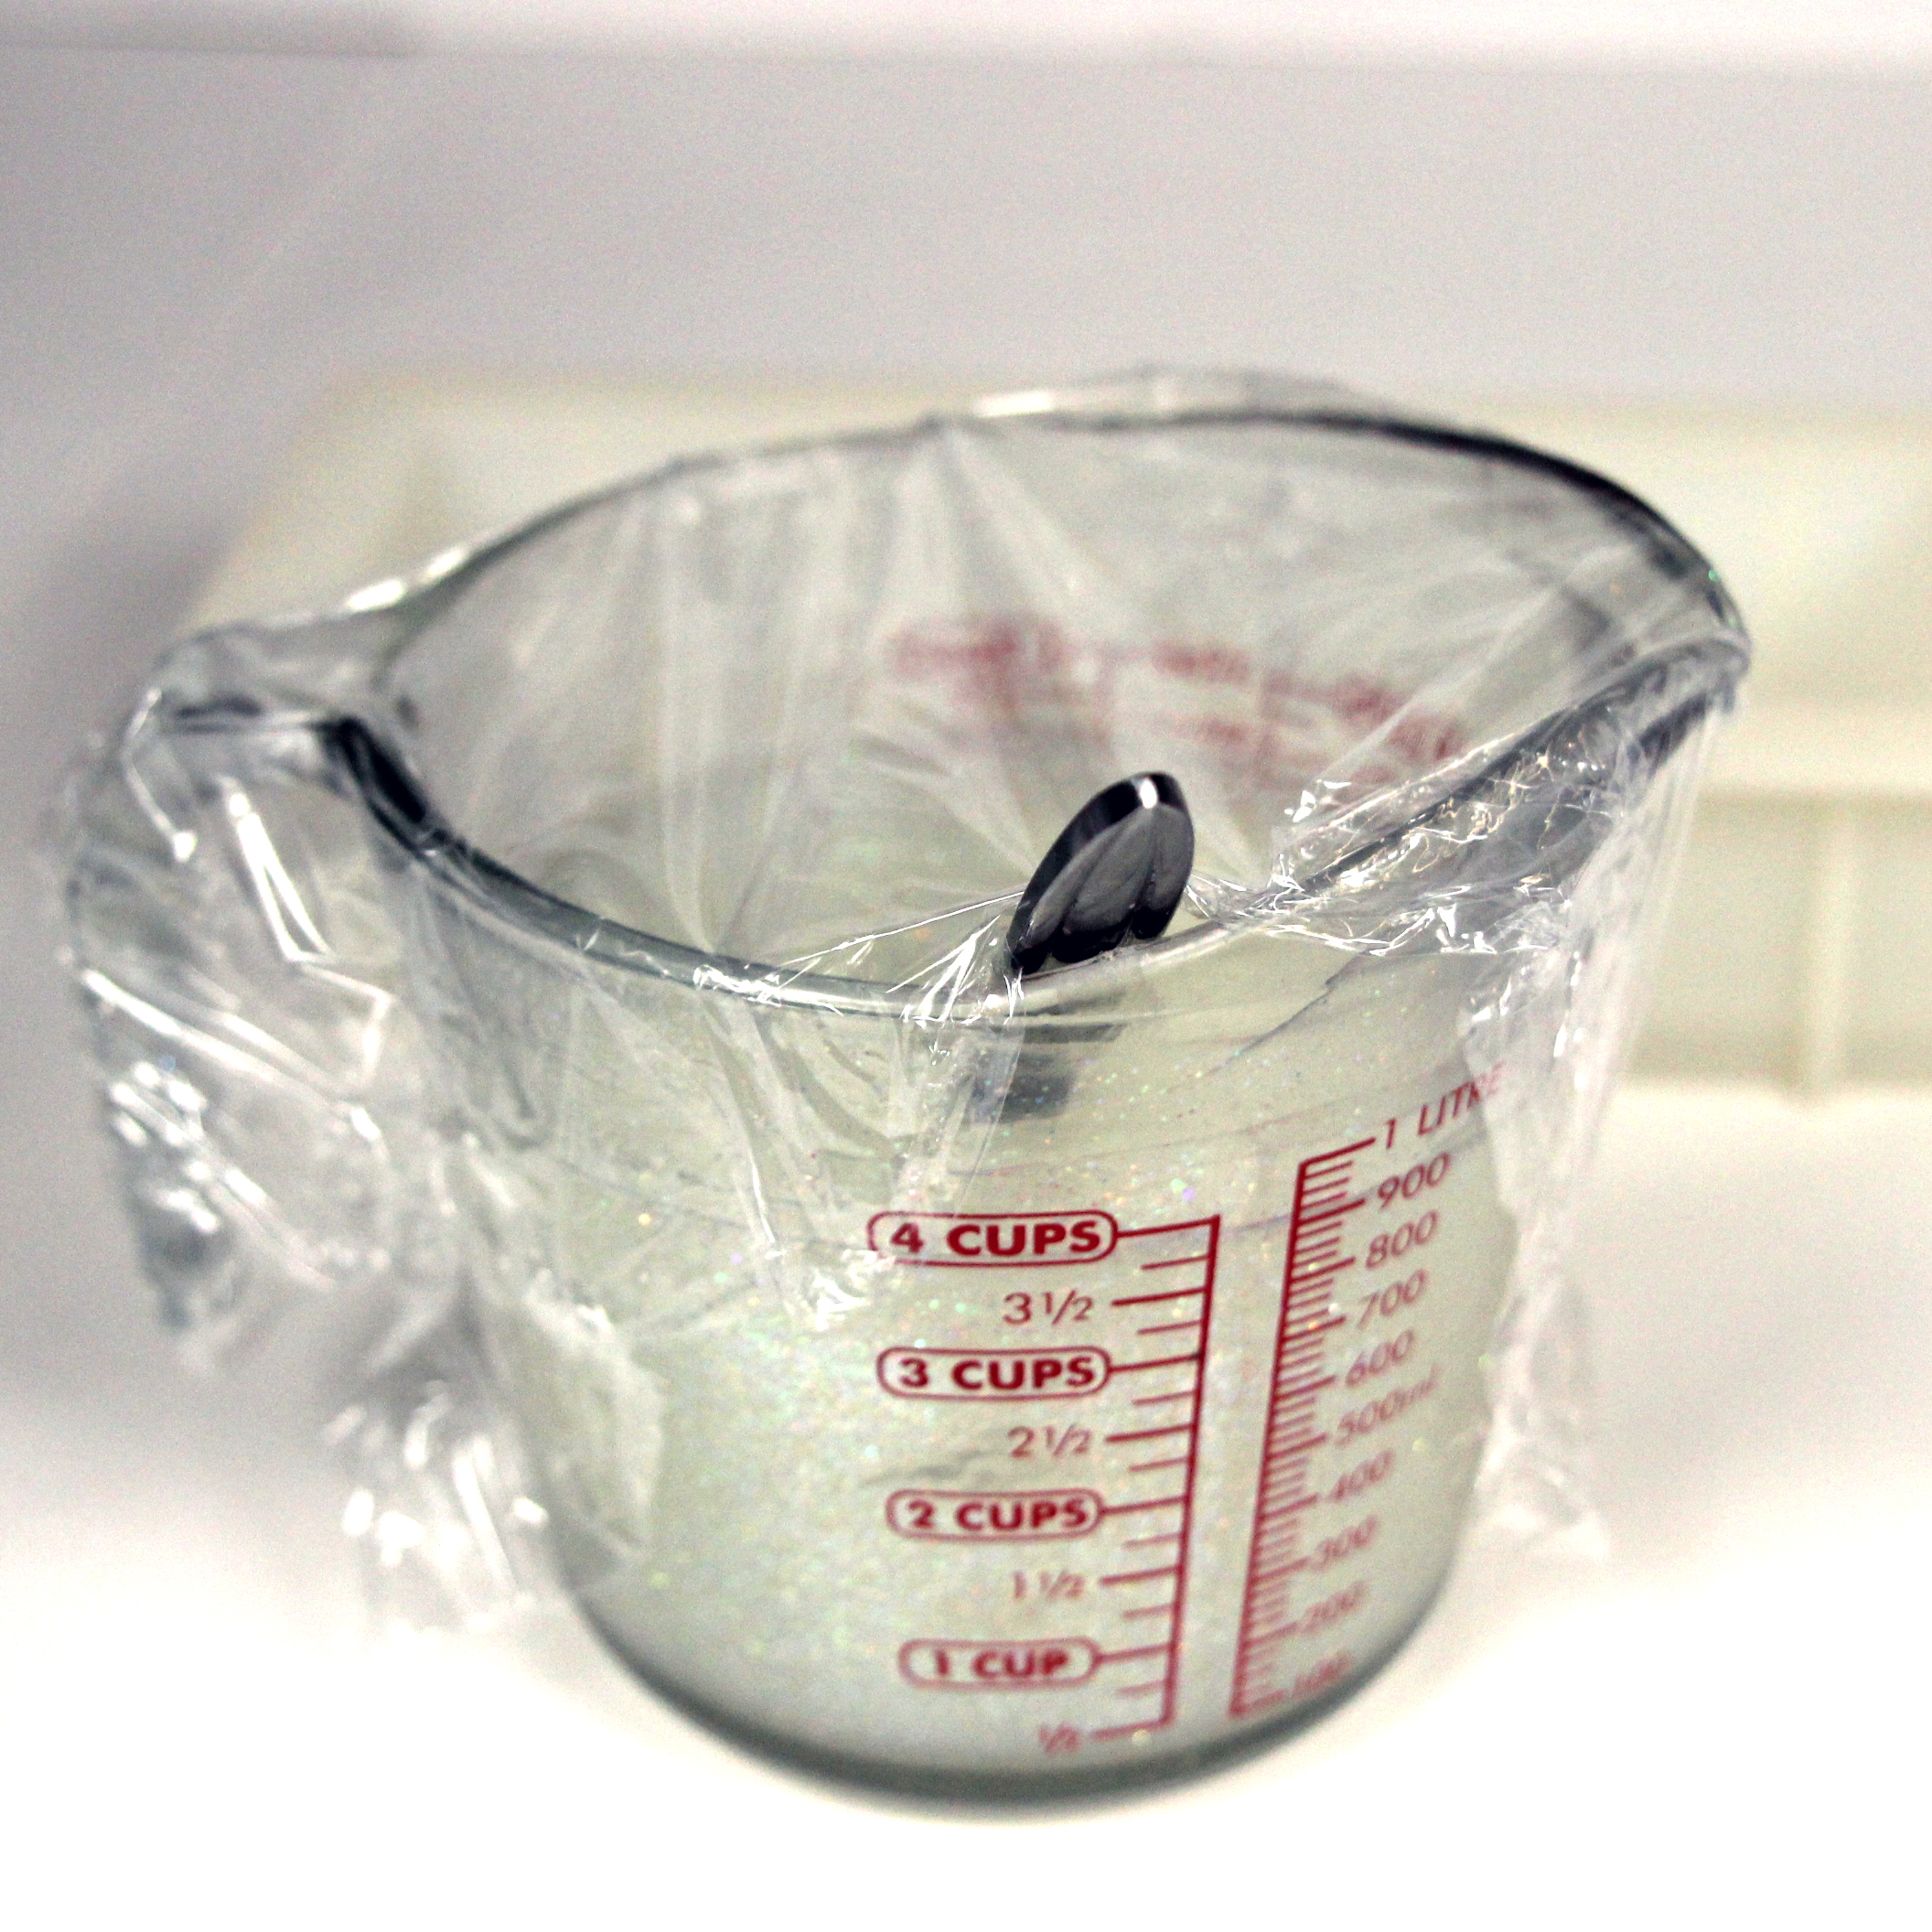
TIP: Cover your melted soap with plastic wrap while your layers are hardening to keep it warm.
SEVEN: Once you’ve poured the last layer, let the soap cool for 4-5 hours. Then unmold by gently pressing on the bottom of the mold to release the airlock. The soap should slide right out.
EIGHT: Cut the soap into squares or rectangles as big or small as you want. Then wrap in plastic wrap or store in an airtight plastic container.
Bonus Tips for Layering Melt and Pour Soap: Layering melt and pour soap is all about timing and temperatures.
(1) Pour the second layer of soap as soon as the first layer has hardened enough (or formed a thick enough skin) to hold the weight of the second layer. The key is to pour fresh soap and pour it quickly.
(2) Spritz the first layer lightly with rubbing alcohol then immediately pour the second layer of soap. This will help the layers adherer.
(3) Pour the second layer of soap at about 130 degrees. If you don’t have a thermometer, let the soap cool down until it gets a little bit thicker and starts to form a “skin” on top of the soap. The soap should not be hot, just lukewarm. If the soap cooled down too much, just pop it back in the microwave on 30 second bursts. Heat as needed.
(4) Cut the final soap loaf as soon as it has fully hardened. Waiting too long may split the layers when cutting.
(5) Remember that this is an art so have fun and be sure to Pin it to remember it!
Be sure to RSVP for Make Your Own Bath and Body Products. I’ll be teaching soap-making and so much more.