
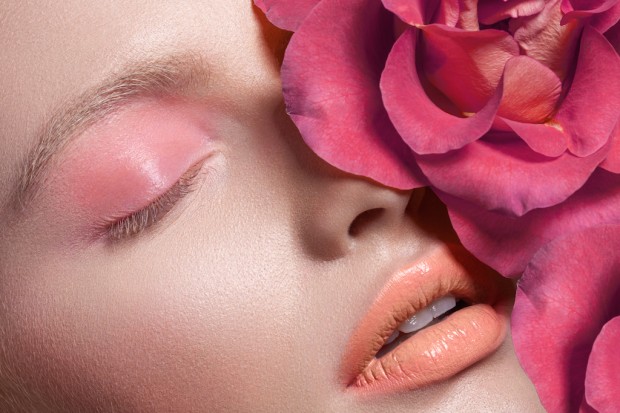
For portraits intended to flatter your subject, beautiful skin is a must. Skin convey’s someone’s strength and vitality. Skin that looks even and fresh helps your subject look healthy, energetic, and more youthful. Unfortunately, there are many different elements that can ruin skin in a photo. Some are caused by camera settings, others by light, and other by post-processing. Let’s take a look at some of these problem areas, and how to prevent them!
 1. Incorrect White Balance
 1. Incorrect White Balance
Often with skin, auto white balance is the enemy. Not only does your camera’s auto white balance read the light in the environment, but it is also influenced by environmental factors like the color of the background, wall, or subject’s shirt. Auto white balance is easily tricked and often leads to inconsistent results in your portraits.
To solve this, you’ll ideally shoot a reference target in your shot before you begin shooting. For example, you may photograph a gray card or a color checker. This will allow you to set proper white balance in post-processing. You will need to re-photograph the reference card for each time you change lighting conditions. An industry standard is the X-Rite passport color checker, which provides both neutral and color patches to help you neutralize the scene. This reference card also has Lightroom plug-ins to help you create custom profiles for different cameras and lighting conditions.
Furthermore, you can also set a custom white balance. A custom white allows you to achieve proper white balance in-camera (without having the try to neutralize in post-processing). One tool you could consider using is an Expo-Disc. This tool allows you to photograph the light in the scene and then set a custom white balance in your camera. Remember, custom white balance is, by definition, not automatic, and will need to be reset in different lighting conditions.
Flatter every subject that steps in front of your lens. Learn how with Lindsay Adler.

2. Color Contamination
Environmental factors can also negatively influence the color of skin. For example, if you take a portrait in a field in the middle of the day, often you have unsightly green tones to the skin from the sun reflecting off of the grass and trees. One solution is to overpower the green-toned light. This can be achieved with a reflector or by adding a strobe into the scene. You do not need to completely eliminate the ambient light, but instead have the white (untainted light) be dominant on the face and skin. Similarly, color contamination can occur from colored walls near to the subject or any other colored/reflective surface near your subject.
Other color contamination can occur in studio shots when the ambient light in the scene starts to (unintentionally) record in the shadows. For example, if you are shooting daylight balanced strobes in a studio, if your shutter speed is too long you may begin to see the light in the room show up in the shadows. For tungsten lit rooms the shadows will appear yellow-red and for florescent lit rooms the shadows begin to appear green. In both situations the shadows have an undesirable skin tone. To avoid this, try shooting at or near your camera’s sync speed.
The sync speed is the highest shutter speed you can shoot at with your camera before you start to see the shutter in your frame when using flash. For many digital cameras this is around 1/200 sec. Try a shot of the scene with your flash NOT firing. What do you see? Ideally, you will see a black frame, and this will reassure you that there is no ambient light recording on your frame. 
3. Color Management (or lack thereof)

Beautifully capturing beautiful skin tones in camera isn’t enough; you’ve got to have beautiful skin tones in your final files and prints! If you forget about color management, you are leaving a lot of skin tone up to chance. First, you need to color calibrate your monitor. Your monitor is your window into your file — its how you see the skin tones, the brightness/contrast of the skin and much more. You want to make sure that you are seeing the right representation of the skin. If not you are making changes and adjustments without an accurate reference!
There are a variety of tools and companies that help you calibrate including software and hardware by Color Munki and i1Display.
Flatter every subject that steps in front of your lens. Learn how with Lindsay Adler.
Next, you have to worry about the print. Going with a great lab is going to be important to the quality of your files. Many labs allow you to print a series of test files (upon becoming a customer) so you can view how your files print in their lab on different papers. Furthermore, you might consider downloading the lab’s printer profiles (ICC Profiles) that allow you to preview the skin tones for their printer/paper combination in Photoshop. Also check with your printer for their desired file size and color space to ensure optimized color accuracy.
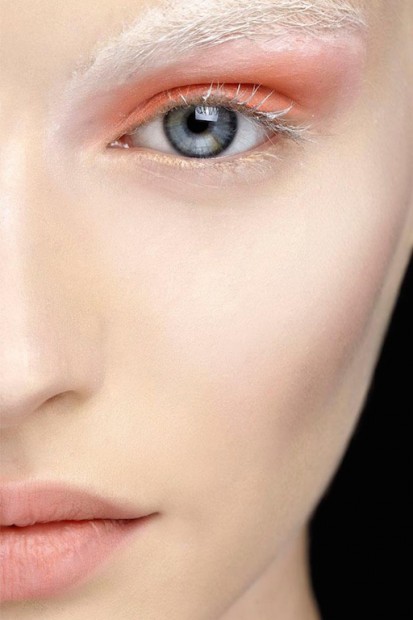 4. “Wrong” Quality of Light
 4. “Wrong” Quality of Light
One reason to choose a particular light source or modifier is to set the mood of the scene or portrait. Another reason to choose a modifier is for how to affects the skin. Harsher light sources (like the sun or a zoom reflector) emphasize imperfections including wrinkles, blemishes and blotchiness. Softer light sources (like soft boxes) reduce the texture and appearance of imperfections. For this reason, soft boxes have become the modifier of choice for most portraits.
As photographers, we must make decisions about modifiers in our photographs. We must balance the quality of light on the skin with the mood that a particular modifier set in the scene. Beauty photographers often select a modifier called a beauty dish because it is soft enough on the skin but still gives enough contrast to shape facial features.
5. Retouching
One of the most common ways that people ruin skin is in retouching. Our goal of retouching is to remove blemishes and imperfections without degrade the texture and original quality of the skin. Unfortunately, a lot of retouching techniques do damage the skin. Avoid blurring skin, over-using retouching plugins, cloning over the same area repeatedly, and more. There are many great retouching tools in Photoshop that help you achieve your retouching goals including the patch tool, spot-healing brush and more.
If you want to retouch like a pro, check out the advanced technique called “Frequency Separation” to help maintain all skin texture while removing blemishes and smoothing out the skin.
In my class Skin 101, I will go in-depth on the tools and techniques to conquer these problems including in-depth retouching. In fact, I will actually cover 10 things that ruin skin (and how to fix them), as well as 10 common skin challenges including very dark skin on location, wrinkles, and photographing mixed skin tones in a single photograph.
Flatter every subject that steps in front of your lens. Learn how with Lindsay Adler.


